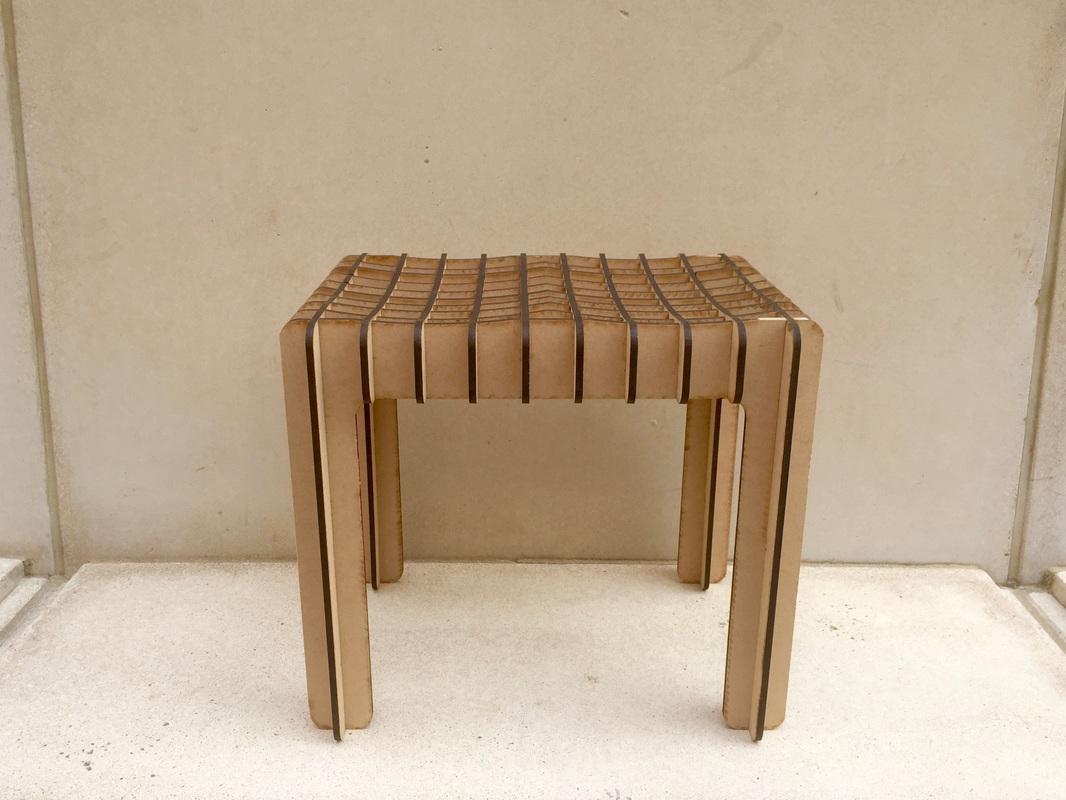
 Design StatementIn so many chairs, my feet don’t touch the ground; hanging over the sharp edge of the chair, cutting off the circulation from mid thigh down. This stool was created to contour to my body. On the laser cutter, I have typically created small, flat things, but this assignment gave me the opportunity to explore the vast possibilities of taking a 2D material, and turning it into a 3D project. I do my best to always design with intention, so I designed to create an item that fixed problems I saw with similar items. Being a smaller than average human, ergonomically designed furniture is often built to suit people larger than me. Which often is fine, but with sitting objects (and tables) lead to discomfort. The 6 Stool solves some of the issues I have with other objects for sitting. It has rounded edges, so they don’t sharply press into the thighs of the sitter. It allows for a person of about 5’4’’ to sit with their legs at a 90º angle, also preventing the afore mentioned leg blood flow issue, while also aiding better posture. The grid top allows for a supportive, but light weight and breathable seat, eliminating the sweaty thighs (and the then uncomfortable removal) from plastic chairs.
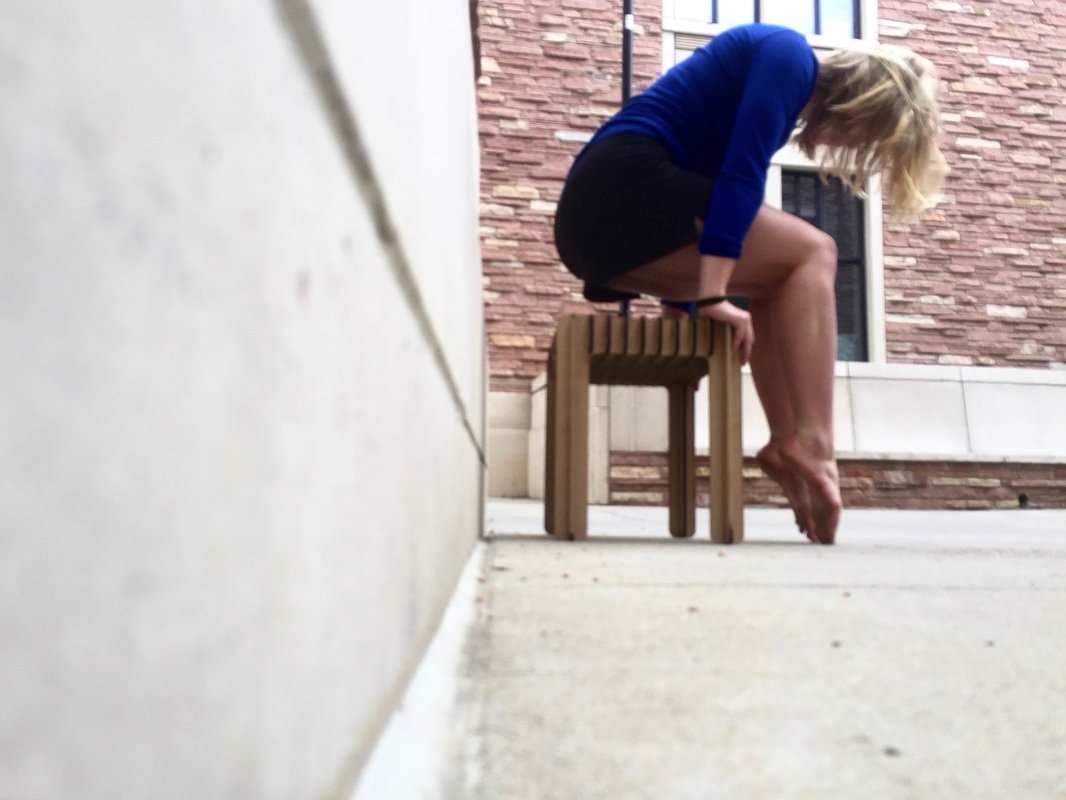 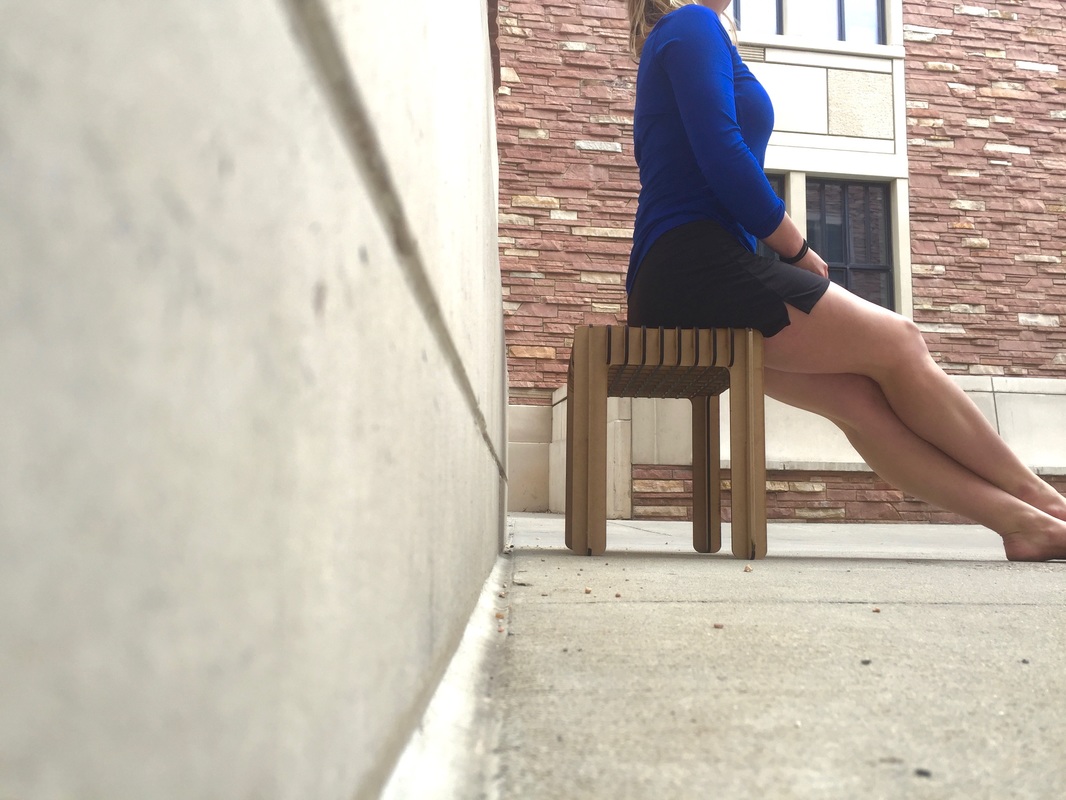 ProcessFirst, I modeled the area of the laser cutter bed and the amount of material I had. If this were a chemical reaction, these factors would be out limiting reactant. I then modeled the basic outline of the pieces that would form the four leg pieces. I chose a very rectangular designed because that yielded the least wasted material. I also really like 90º angles. The top rectangle was copied and the used for the slats to go between the legs. I then placed the location of the slats using rectangles exactly as wide as the materials is thick, knowing the laser cutter would kerf off some of the material so they fit together snuggly. After that, I extrudeded all the pieces, and put them together as if they were physical, and created a butt that I BooleanDifferenced to create the seat shape. I then deconstructed and silhouetted the solids, and deleted all the curves and solids that were not on the same plane. After that all the pieces were complete, and I went to work arranging them to make the best use of the material space. There are more technical descriptions as captions to the photos in the slide show below. MODELINGCONSTRUCTIONThe production and construction couldn't have been easier! After a few test cuts, everything cut out cleanly and beautifully (except for one corner which went off the edge of the laser cutter a tiny bit, which can be seen in the close up photos below). I then put all of the leg pieces together, then the first layer of slats, and then the top layer. They fit very well; some were tapped in with a hammer, which really makes it sturdy. ADDITIONAL PHOTOSDownload the Model!
0 Comments
Leave a Reply. |
archive
January 2018
topics
All
|
||||
 RSS Feed
