DESIGN A
DESIGN B
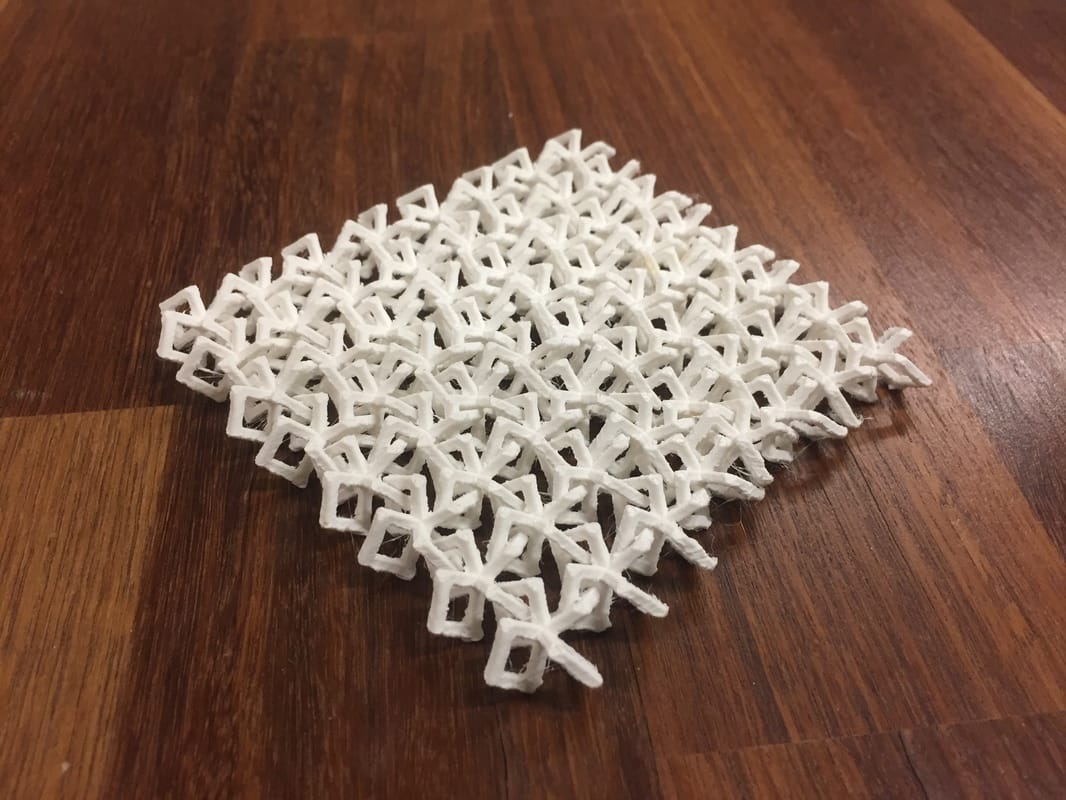
DESIGN PROCESSPRODUCTION PROCESSDESIGN STATEMENTThe purpose of this project for me was to create something that intimidated me; and I have always been intimidated by multiples that fit together. This was entirely supposed to be conceptual — an initial “can I work this out at all,” rather than a finished project, despite the fact that there were multiple iterations (in rhino and physical). The implications of 3D printing in relation to the customizability of clothing is phenomenal, and my goal is to be in the forefront of that new design sphere. This is the first of many of its kind, but there is always a first version. I found that I was limited by my production method more so than I was limited by the possibilities of design. I could have done some kind of more knit like structure, but I would have needed support material (which I was very set against requiring, and the final design does not require support other than a brim). All in all, this was a successful first version of what is hopefully the start of a line of 3D printed fashion.
1 Comment
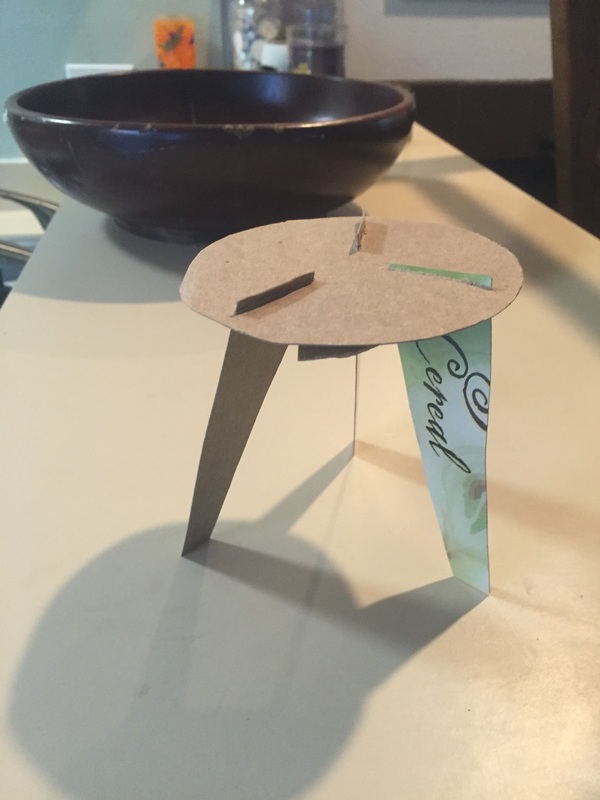
PART II created a little card board version, mostly to illustrate the connection. The issue with this was that the cardboard had to be too close together. I started to model this (see below) so that there was more toothpick like legs than large wedges. PART II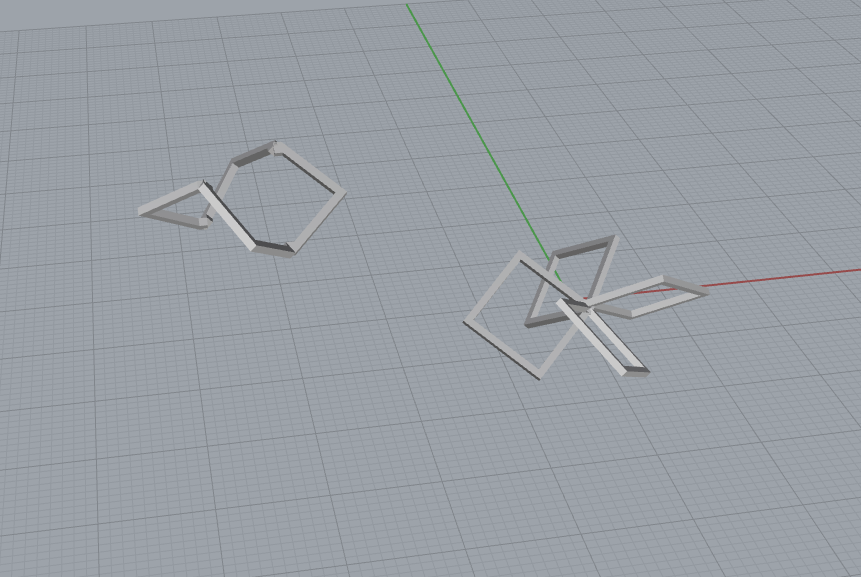 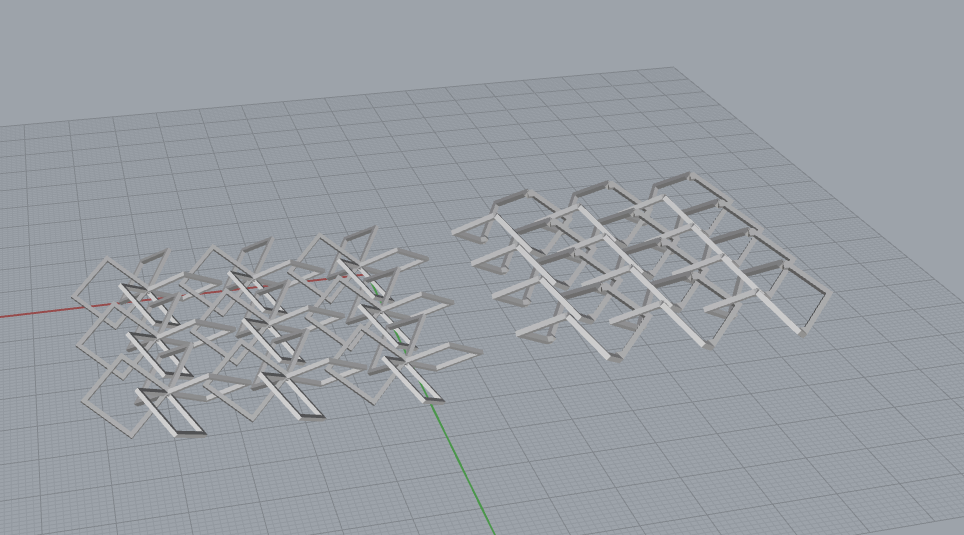 Suing the inspiration I found, and the insight from my cardboard model, I built these. all pieces are at 45º to the print bed, so they would be able to print without support structure. I have also tested the wether the printer would be able to print as thin as I wanted these designed. On another test print, the thinness worked. I am planning on printing these tomorrow morning, but they should go well.
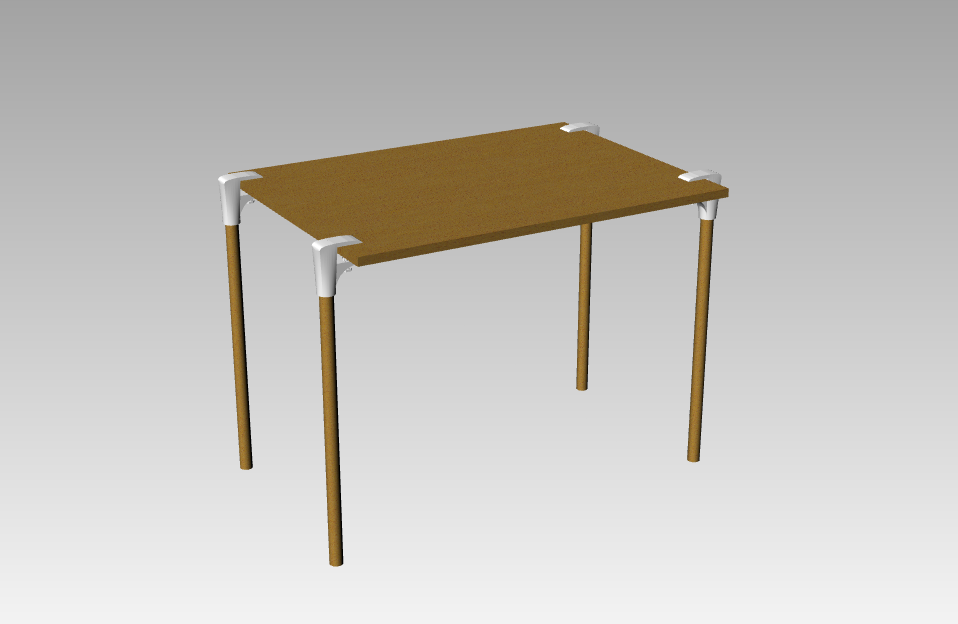
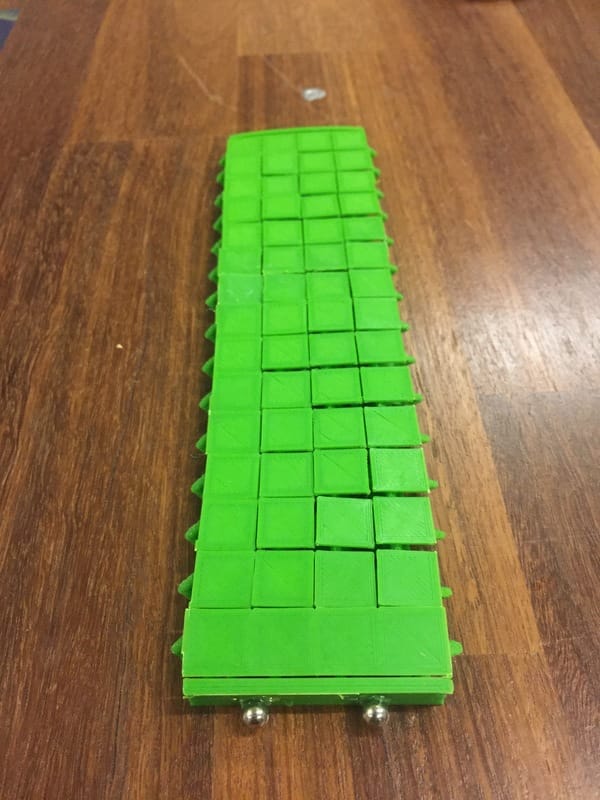
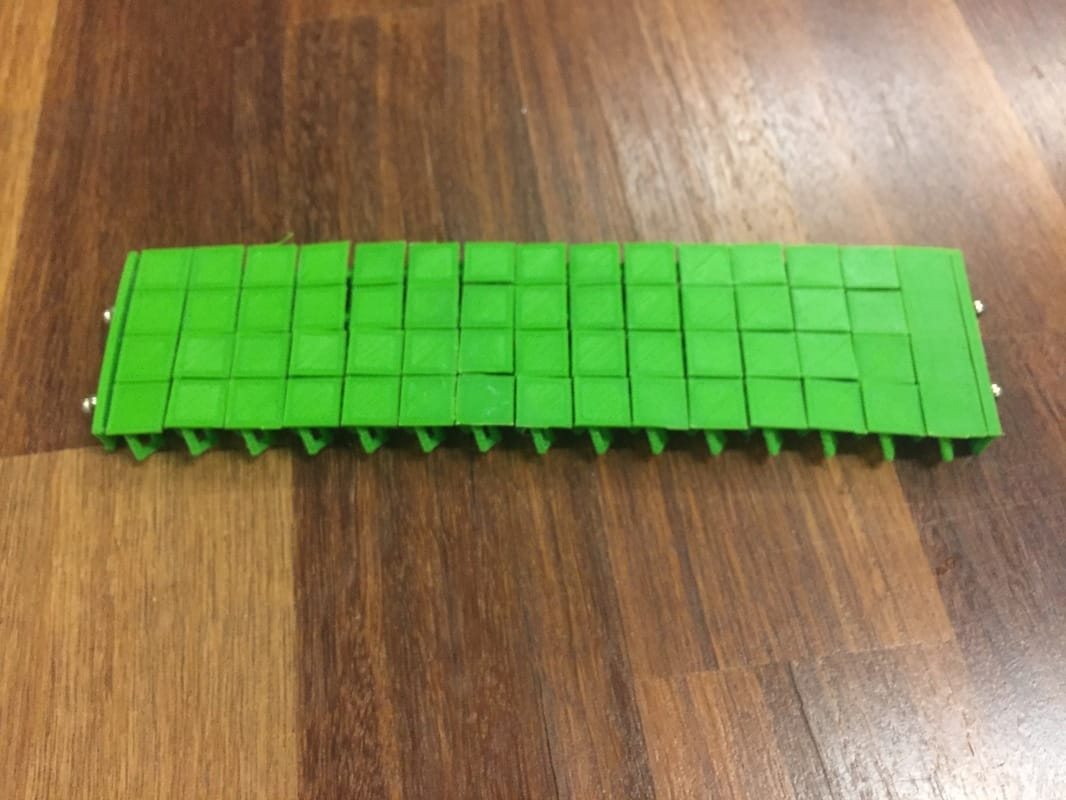
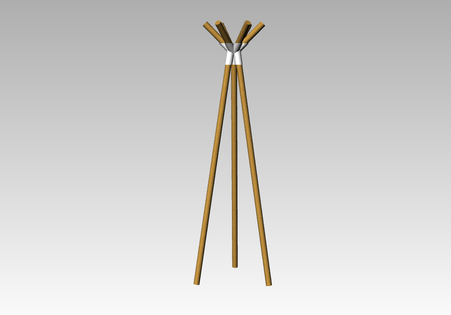
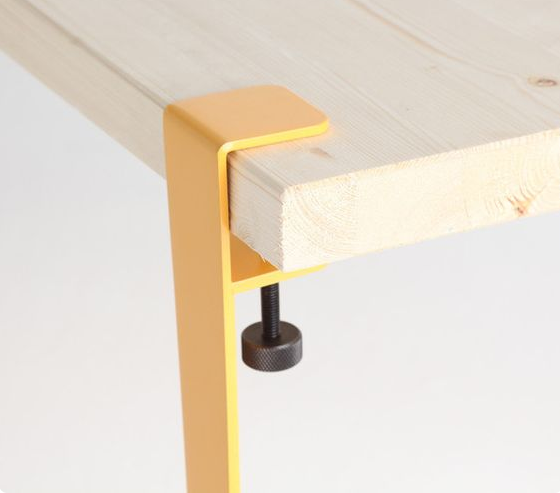
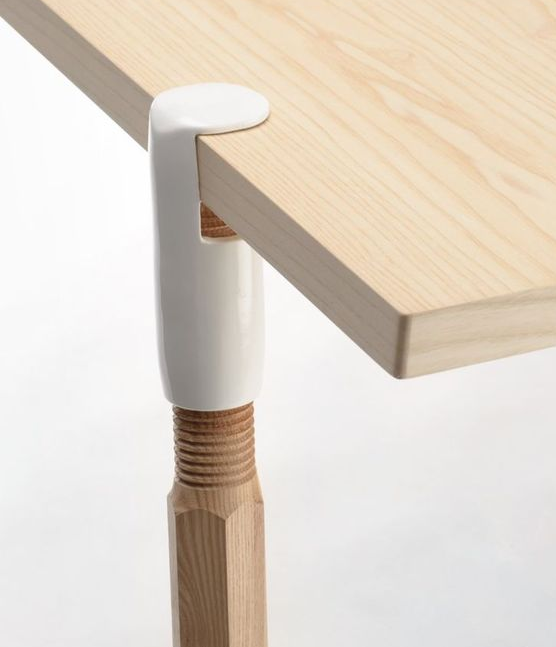
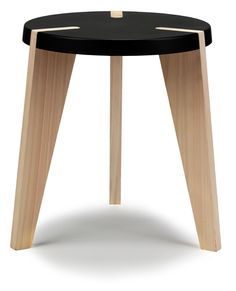
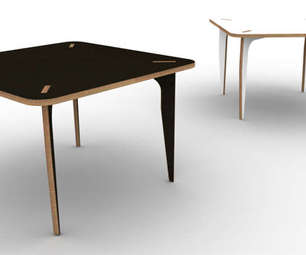
I have found this topic pretty fascinating for a while. Although I am a little hesitant to call it anything but a 3D synthetic printed textile. Since it is made from plastic, and plastic is synthetic, and synthetic is defined as made by a chemical synthesis, especially to imitate natural product from the Latin syntheticus, from the Greek sunthetikos, based on suntithenai to mean "place together," we are able to call it synthetic. It is not cloth. Cloth is defined as woven or felted fabric made from wool, cotton, or a similar fiber and the origin of the wood is poorly defined and mostly unknown. And fabric also does not work, because it fabric is defined as cloth, typically produced by weaving or knitting textile fibers, which I have already ruled out as a suitable word to describe the item I wish to produce in the method I am producing it. Fabric is from late 15th century French fabrique, from Latin fabrica ‘something skillfully produced,’ from faber‘ worker in metal, stone, etc.’ The word originally denoted a building, later a machine or appliance, the general sense being ‘something made,’ hence sense 1 (mid 18th century, originally denoting any manufactured material). The origin of the word forms its ill fit for the task of description, as it has more to do with the fact that it is made, rather than how it is made or what it is, which makes it as descriptive as WiFi, which only tells us what it isn't, not what it is. So that leaves us with the word textile. Textile is defined as type of cloth or woven fabric and the branch of industry involved in the manufacture of cloth and is derived from from Latin textilis, from text- ‘woven,’ from the verb texere. While this is still primarily defined around cloth, which we have already determined that items made by a 3D printer are not, it depends more on the fact that is woven. The design will ultimately have to be woven or linked to create an item that is made from hard plastic that is designed to have motion. The next word that causes us some trouble is the word flexible. Because while this textile will move, it is not flexible. Flexible means capable of bending easily without breaking. If the item its self bends, the plastic is brittle and it will break. It is the strategic placement of areas where there is no plastic that give its motion, making the motion come from joints, rather than flexibility. So this leaves me with only a very few words we are able to use; 3D printed, linked, jointed, synthetic, and as a stretch, textile. I use 3D printed to describe the process of production, synthetic to denote the material, and textile to denote how the item should be used. Therefore, I will be making a 3D printed synthetic textile. All definitions are from Google. Cool Links MIT Project New Textiles Class Website ETextile Summer Camp - Really cool LED thing going on here too. 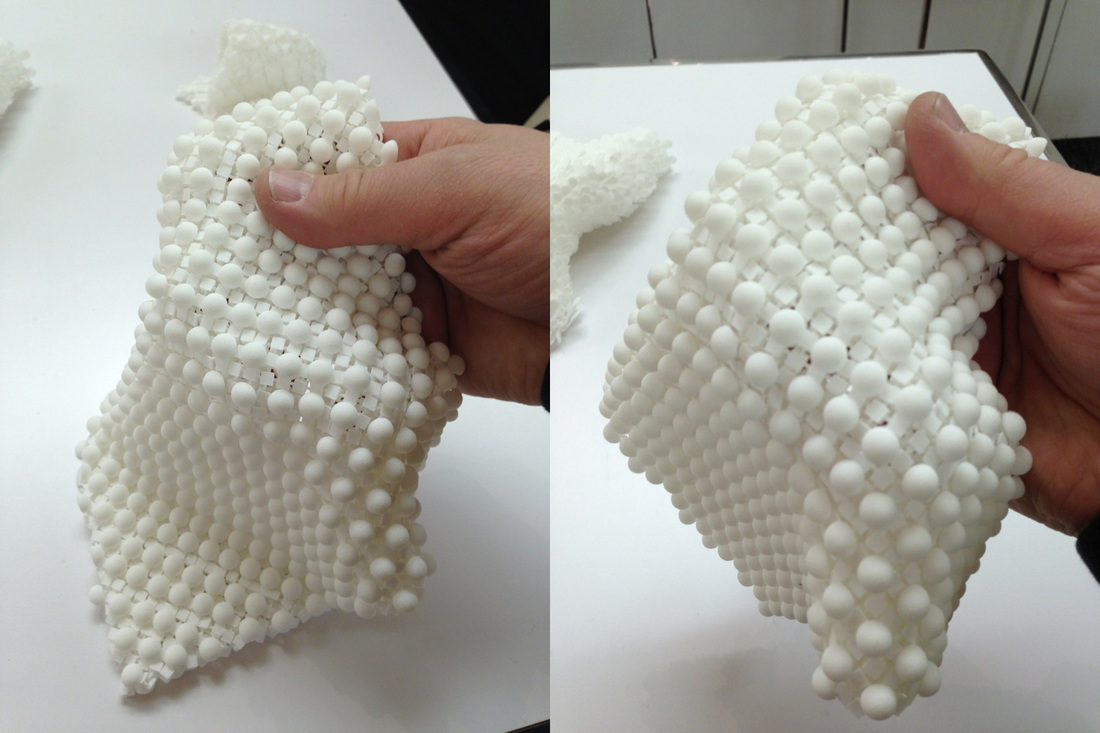 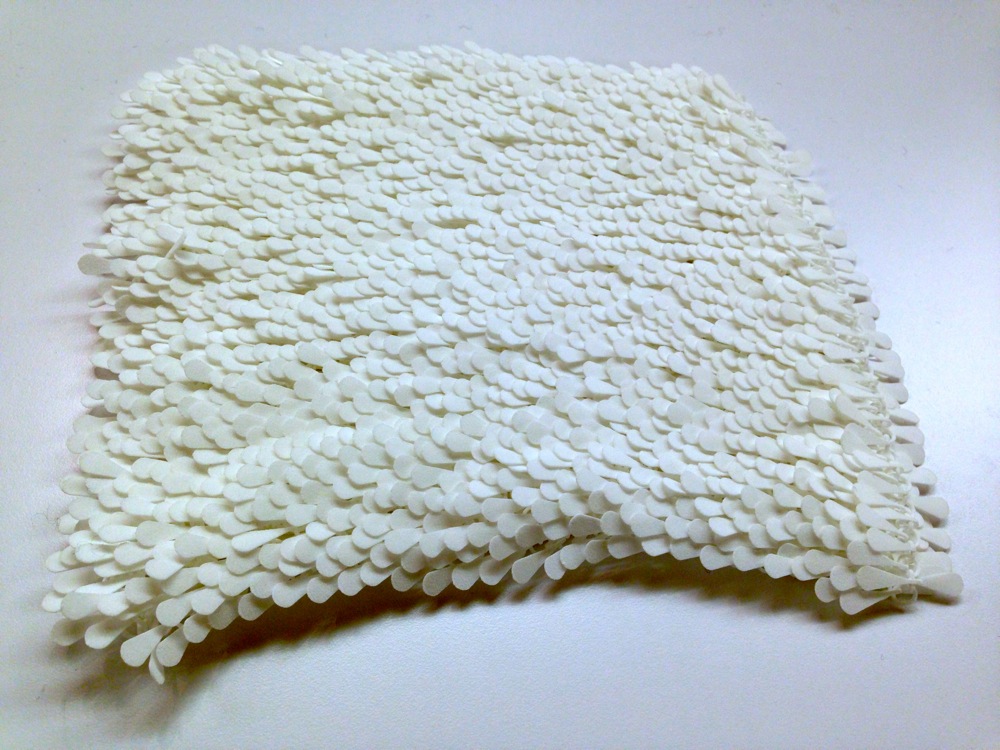 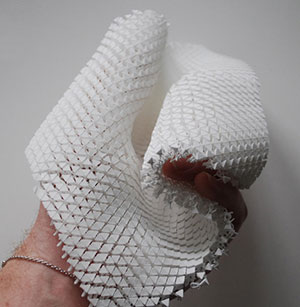 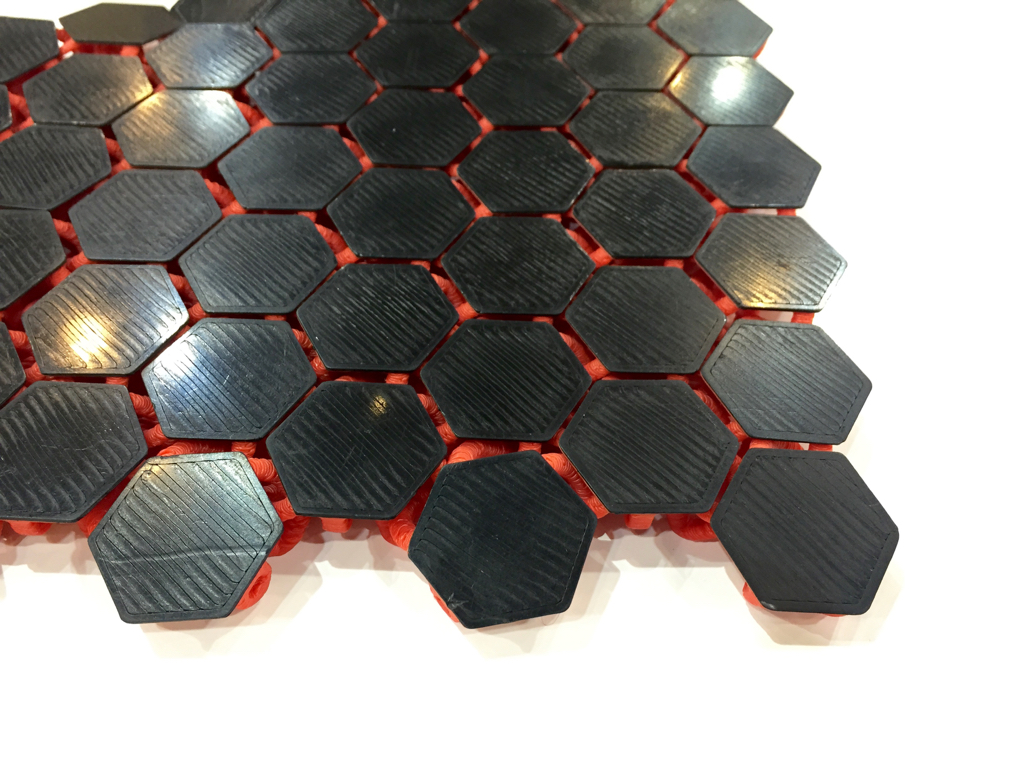 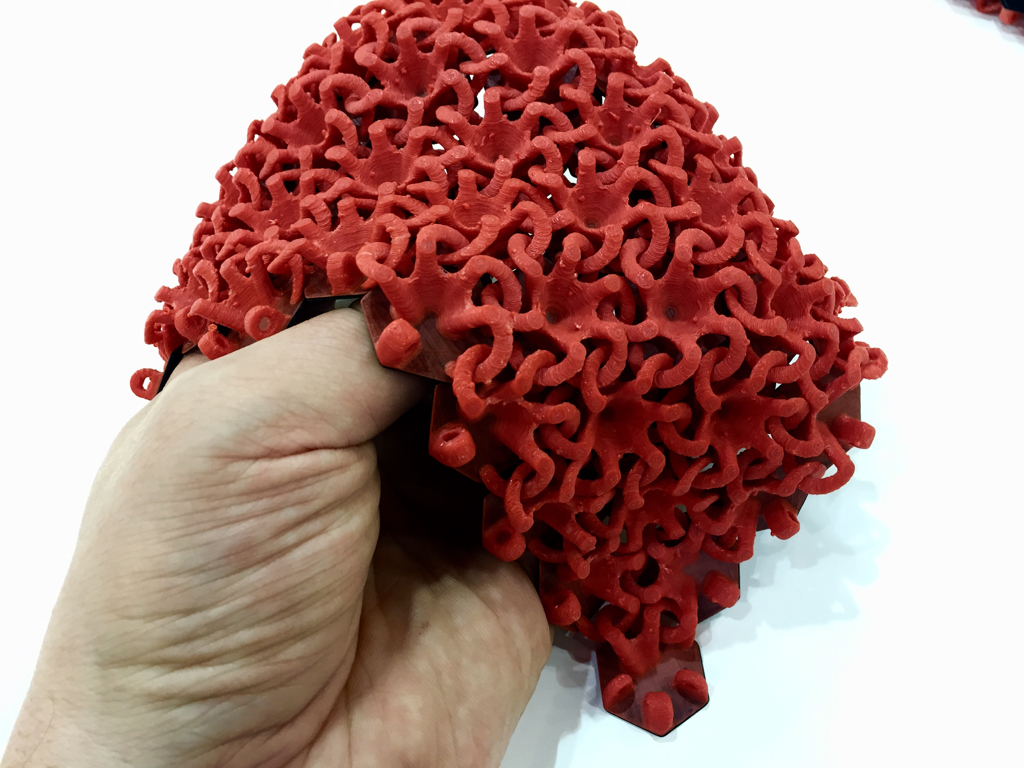 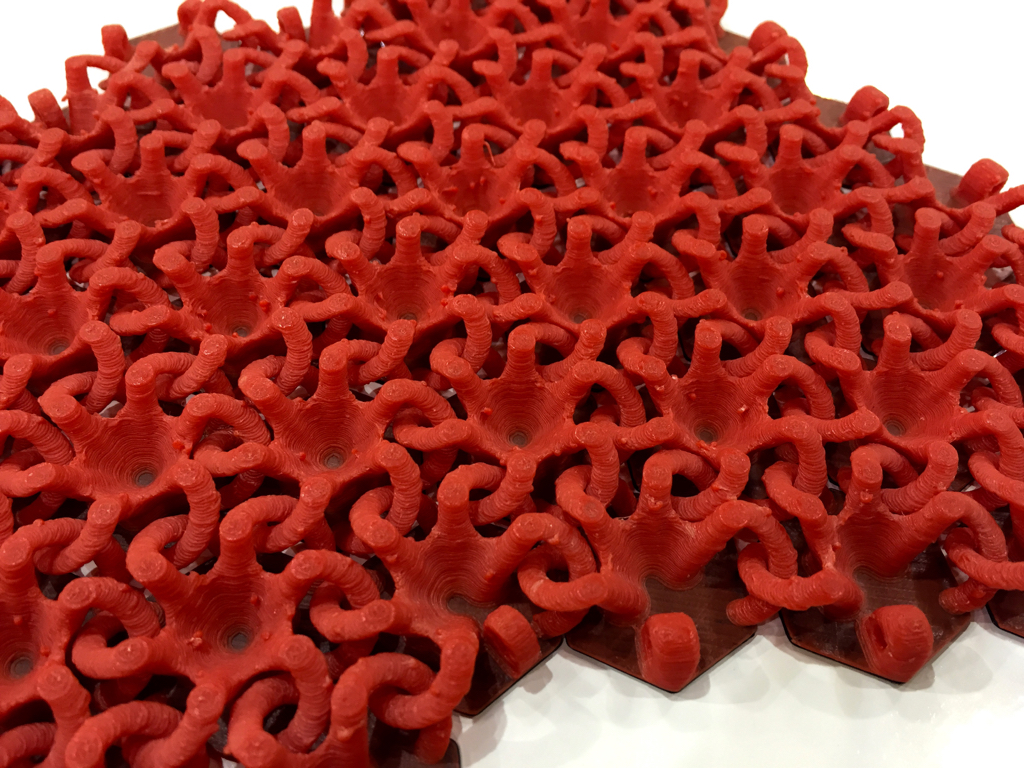 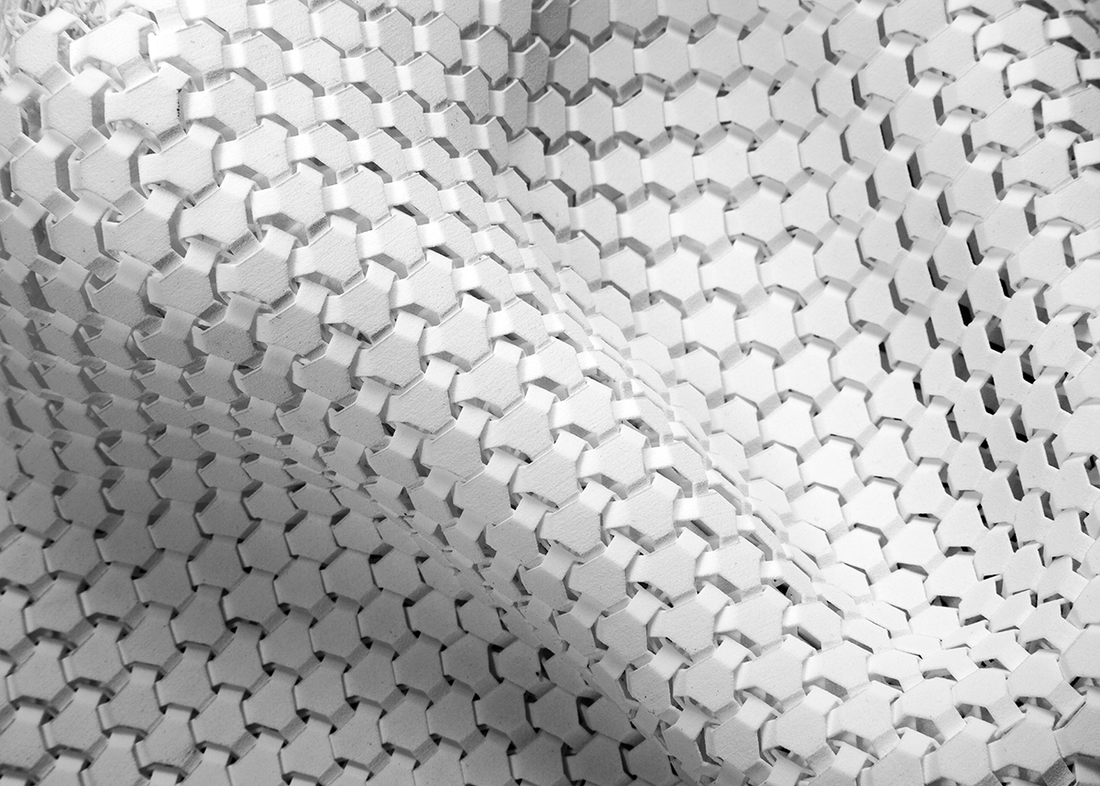 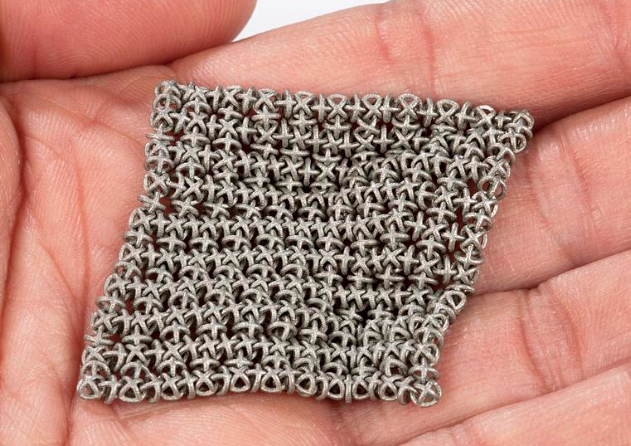 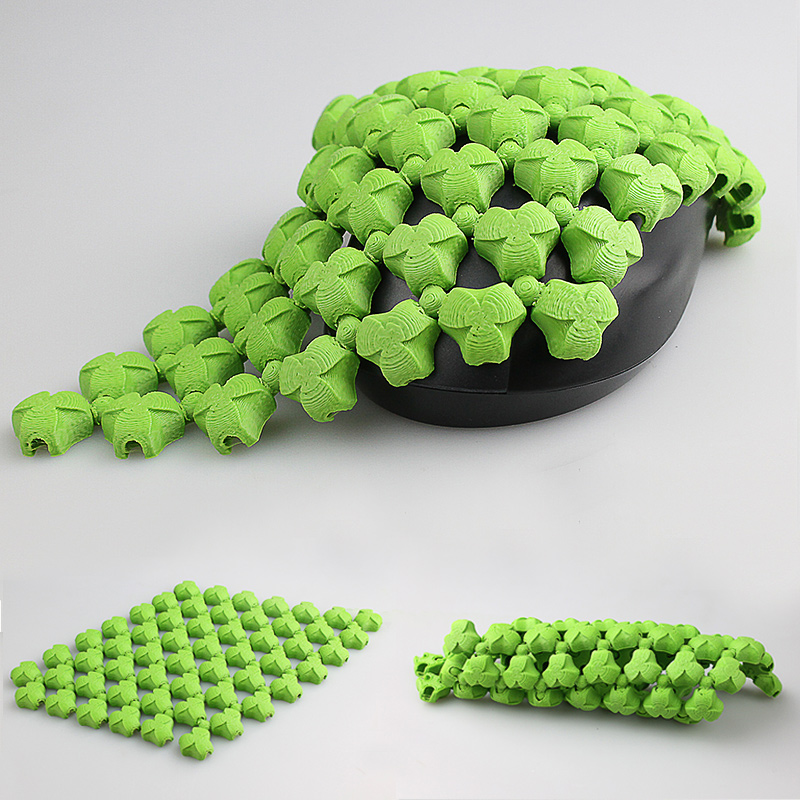 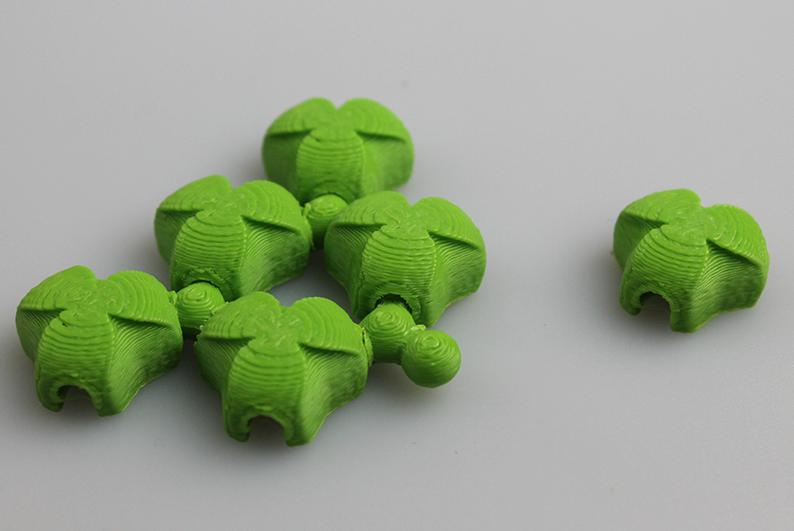 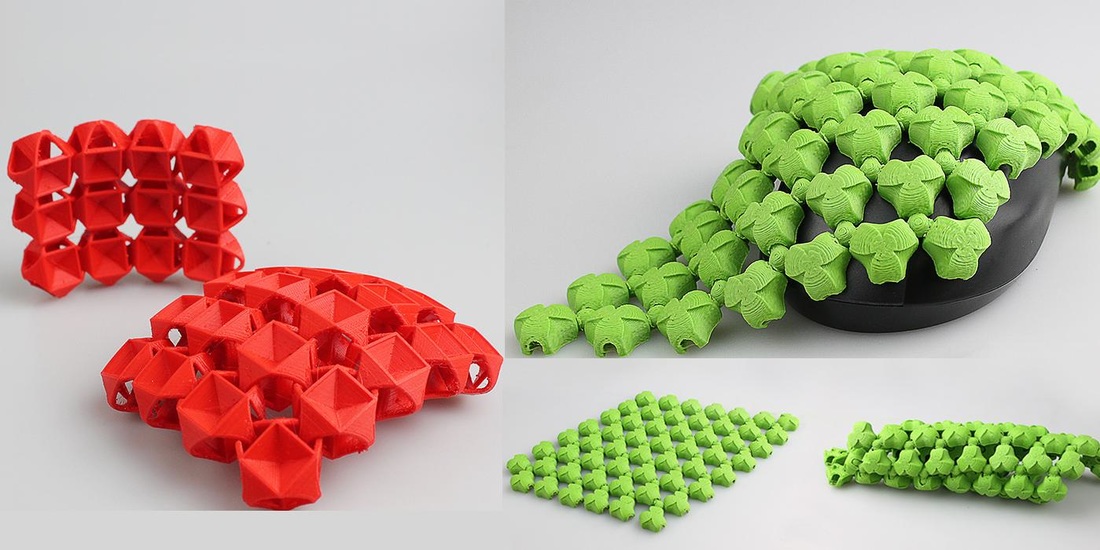 https://3dprint.com/50426/3d-printed-meso-material/ 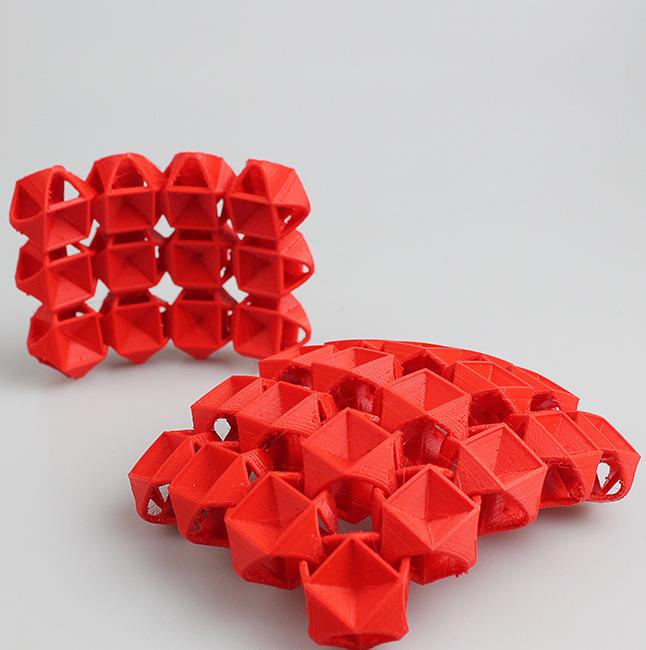 https://3dprint.com/50426/3d-printed-meso-material/ 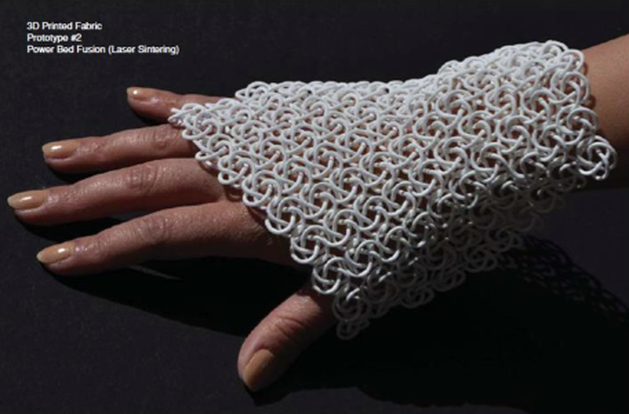 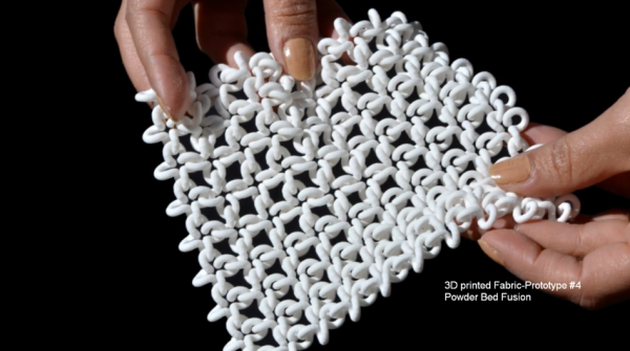 http://www.3ders.org/articles/20140128-3d-printed-flexible-textiles-a-stitch-toward-personalized-clothing.html 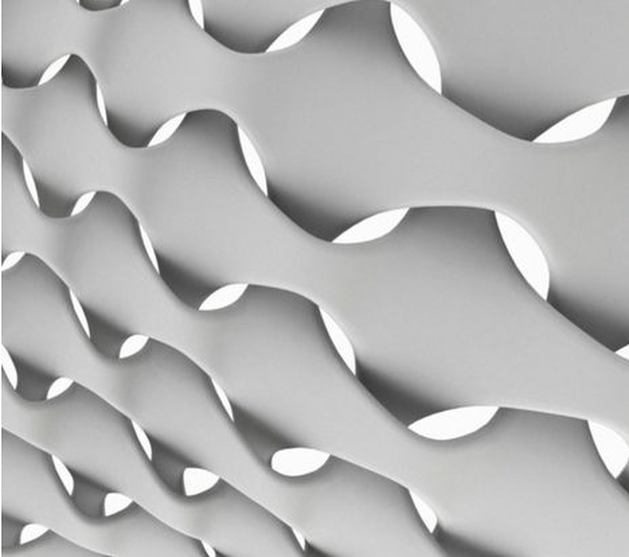 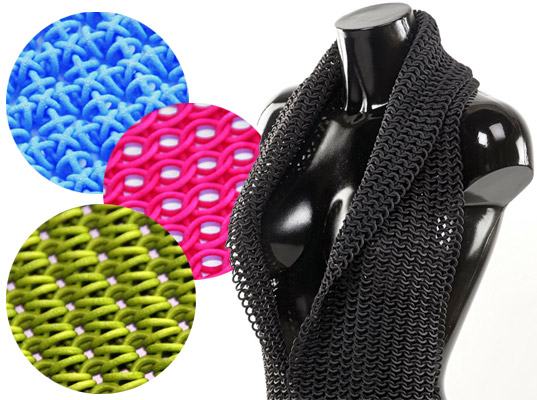  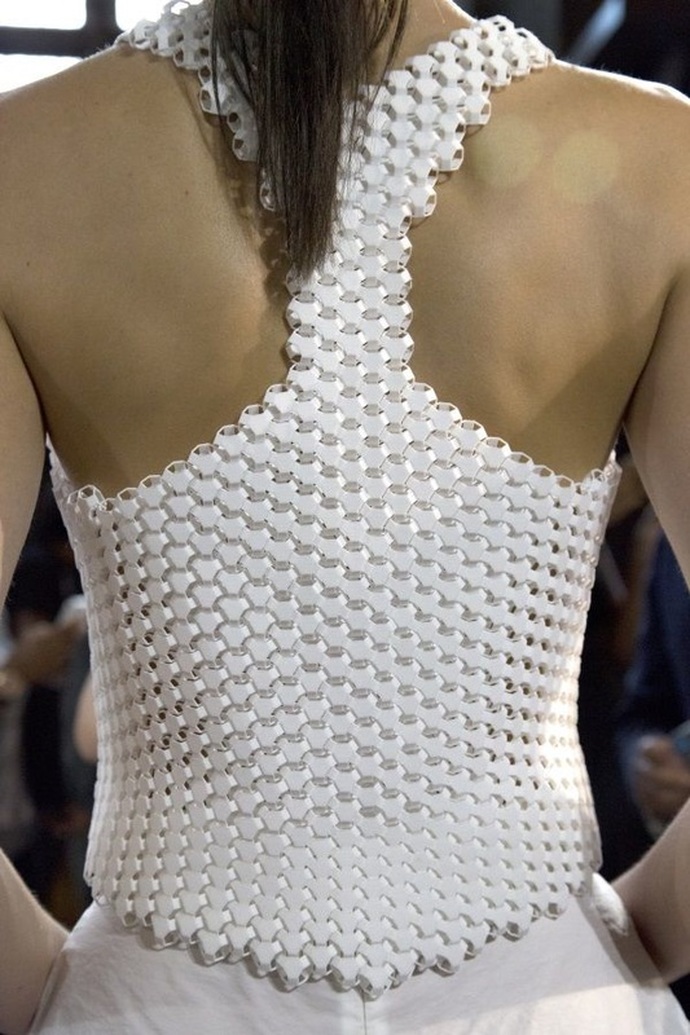 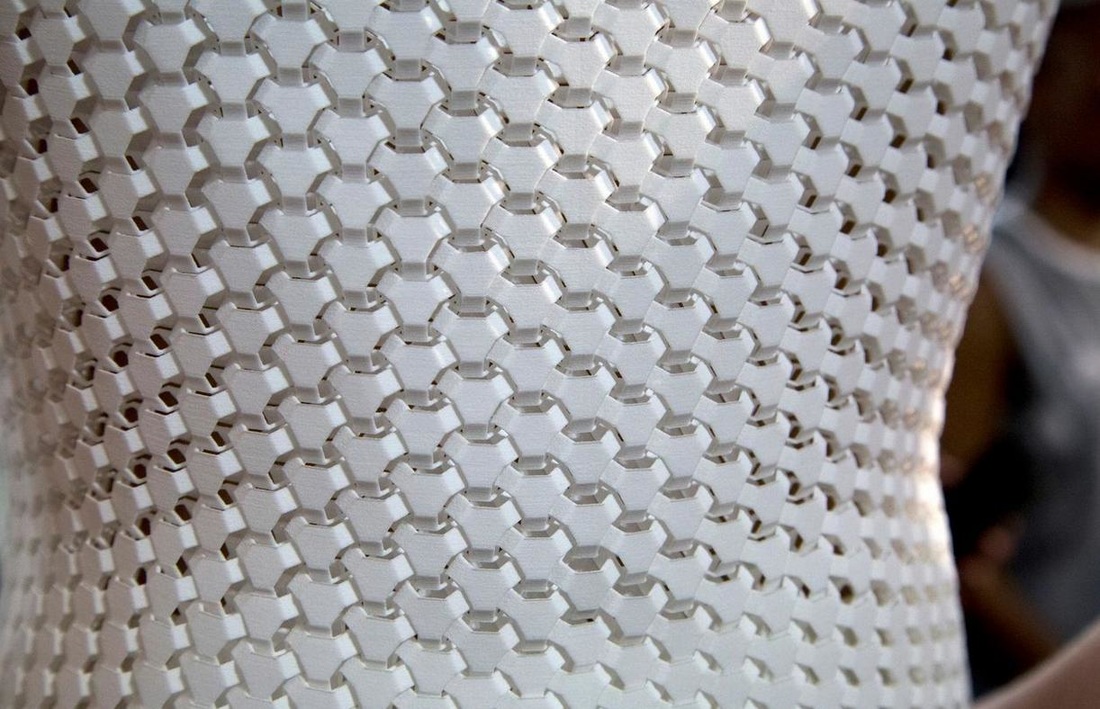 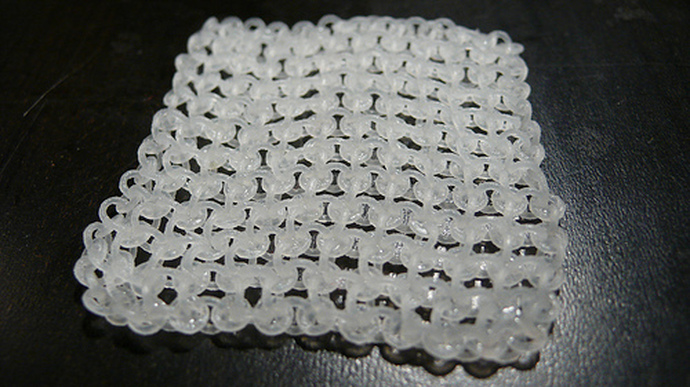   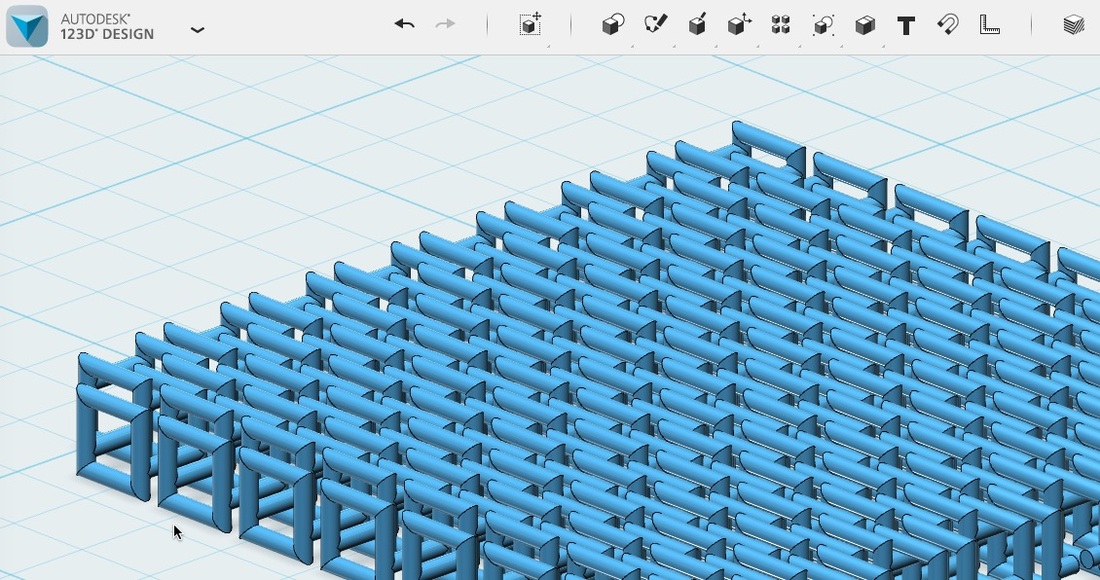 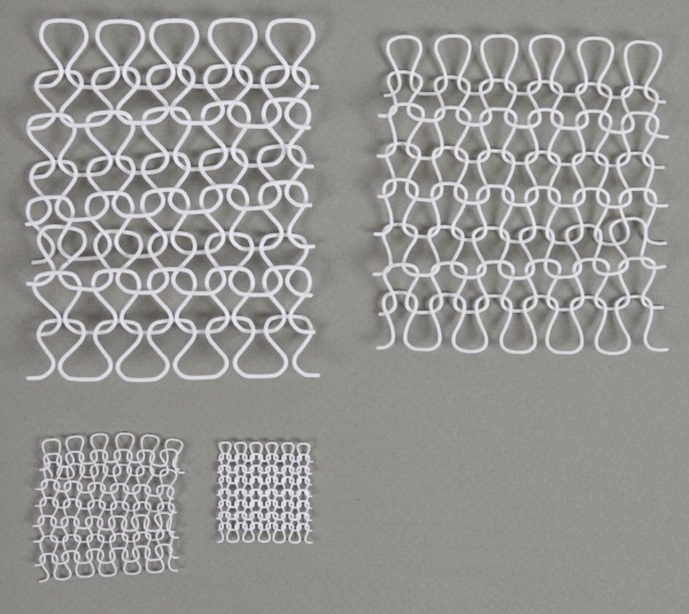     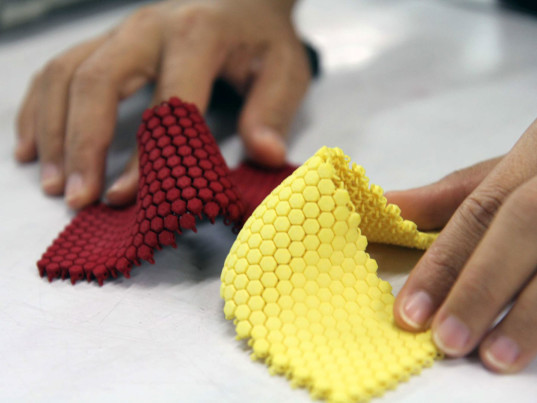 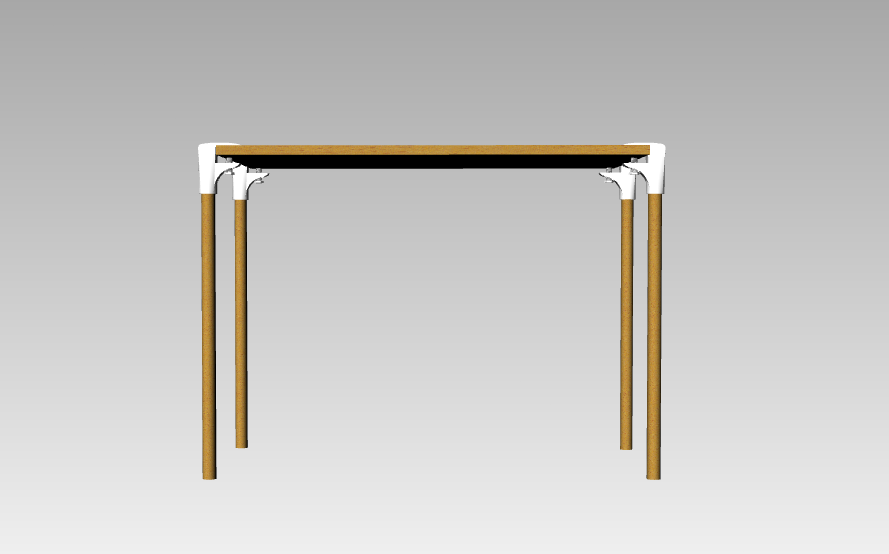 DESIGN STATEMENTThe inspiration behind this project began with our shared interest in furniture as well as designing for functionality. Inspired by various plastic and metal adjustable table clamps, and keeping in mind Dieter Rams’ ten principles of design, we decided upon a PLA adjustable table leg connection that embodies functionality, customizability and sustainability. The goal of our minimalist design approach is to produce a simple and honest product that allows the user customizability without over-complication. The two-piece assembly consists of the table clamp and a screw. The adjustability of these clamps allows for dimensional freedom in both the thickness of the tabletop as well as the length of the legs. For the material, we chose white PLA for a clean aesthetic as well as sustainability. We believe that our adjustable table leg connector is versatile and useful for any user. Link to my project partner, Sara's, blog.
 DESIGN PROCESS PRODUCTIONDONE!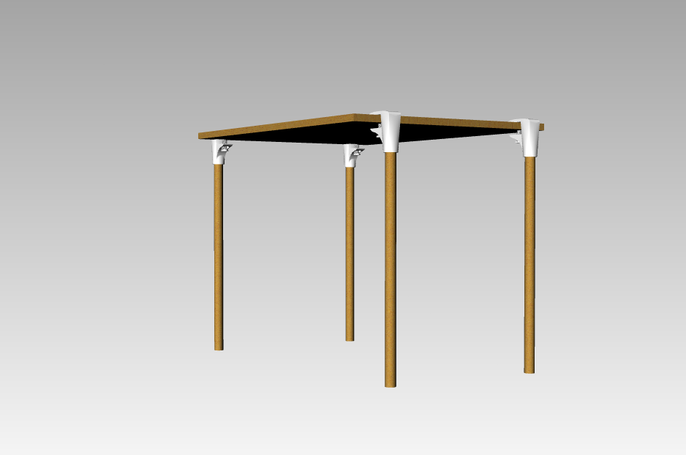
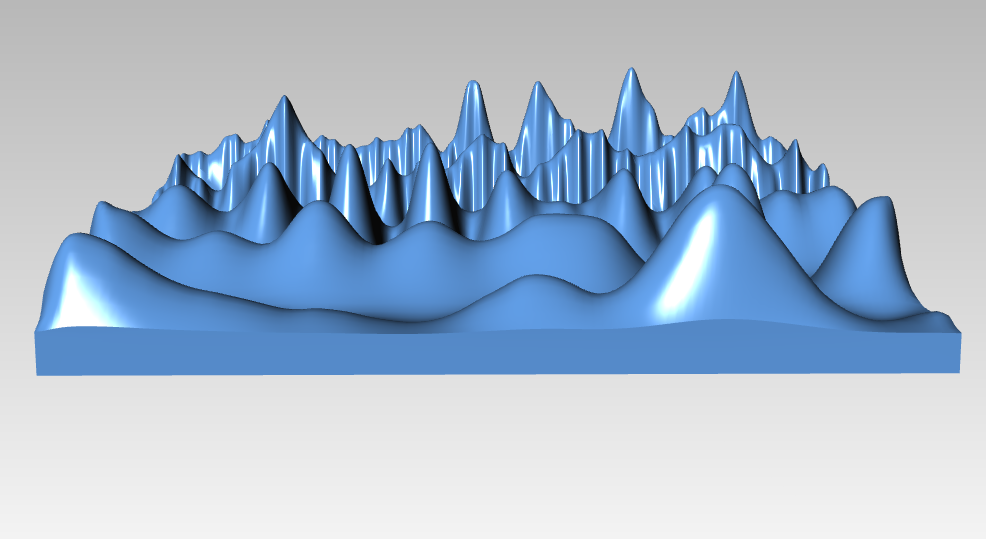 This project was created for FORM, Assignment 9: Sculpting Data. I sculpted brain waves. I have always been fascinated by the function of the firm grey matter that encloses an astounding amount of chemical reactions that define who we are and what we do. The example used to create this visualization is from here. While this website looks sketchy, old, and unreliable, it is the same one our professor presented in psychology. For form was chosen because I like mountains, and mountains are often on my mind. 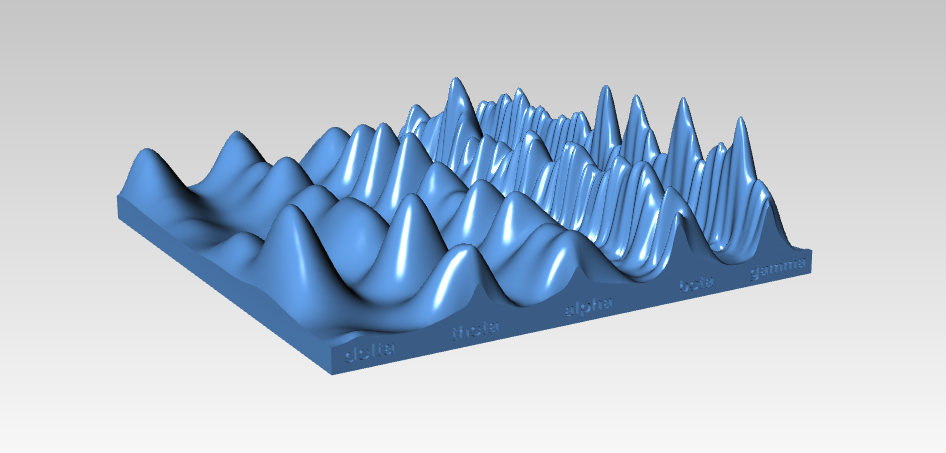 This was created to fulfill the assignment 8 for Form at CU Boulder. 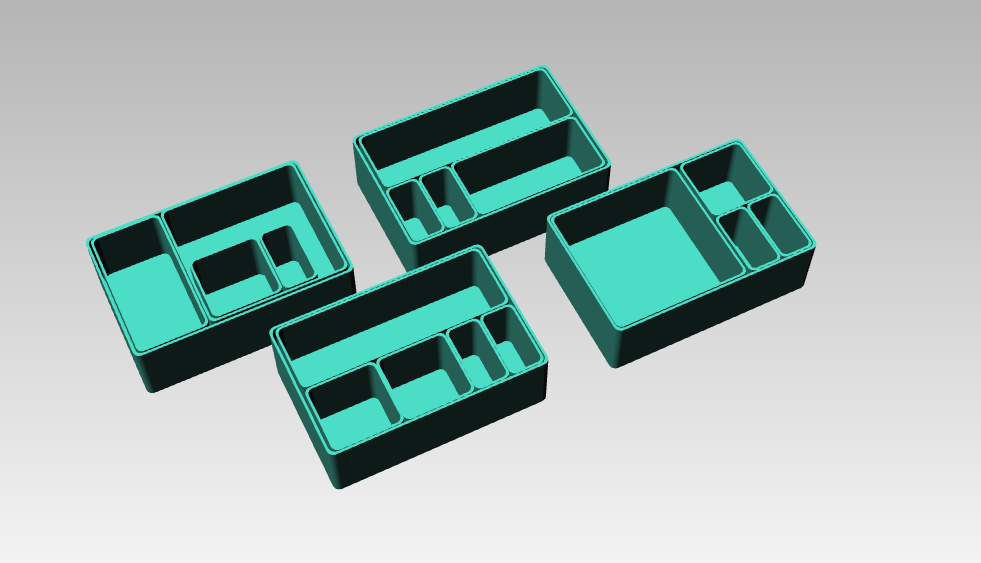 I made these as an attempt to make a better version of the travel bento boxes that are available. All the containers always seem to be too big or too small or not to be able to fit what I want. So, I made these to solve this problem. One problem and you can never fit a sandwich; so I made a large square container to contain that (or popcorn). The other problem I solved with this was the ability to have a good spread of cheese and crackers (and olives or grape and a non dairy protein, of course). Most containers are too big for just a serving of soft cheese, but if you put the crackers and cheese in one larger container together (without using a plastic bag), the crackers get soggy. So that was the goal. However, I realized that for this assignment I wasn't really able to put the time in to design a clasp to keep the whole unit closed, so it stands as a food container concept or as a great desk organizer. 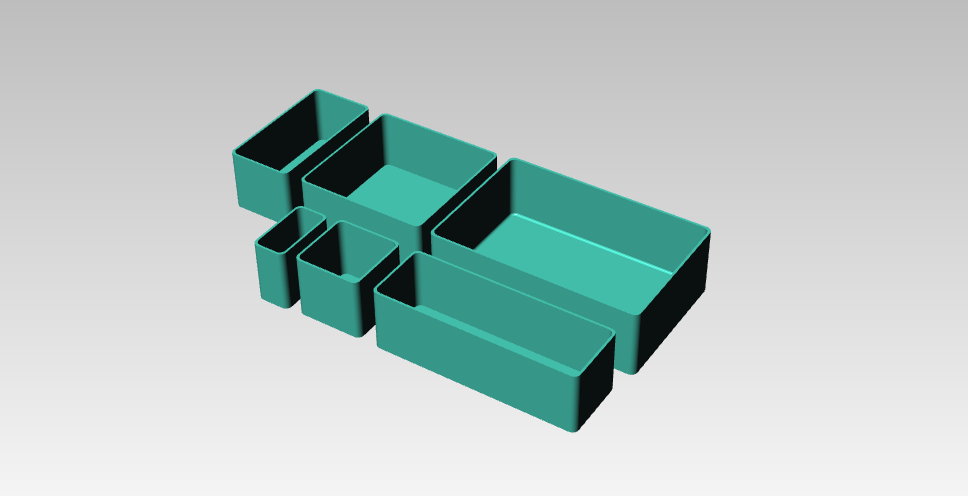
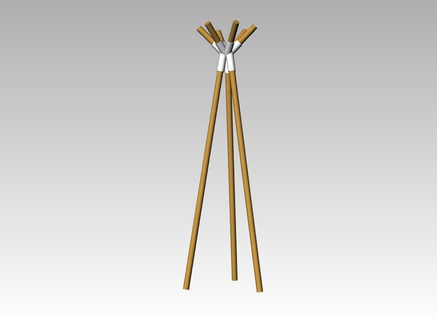
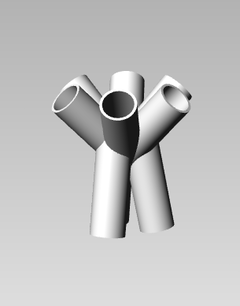
The model was created for FORM assignment 7: Connector. V1
This was my original design, and I liked the tubes being cut off at a 90º angle, but I worried that this may not for sure be the most attractive option and it certainly wouldn't print well, because every angled bit would have its best 3D print with support structure, and I wanted it to print clean without support. The challenge was to build this in a way the 3D printer could print, particularly considering the internal structure and the intersection of the tubes. V2
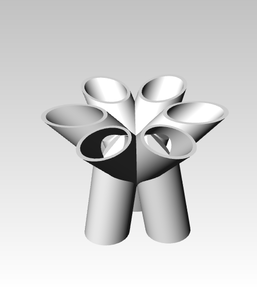
This is the same as the first, but instead of cutting the legs short with the cubes, I simply used wire cut. I did this for two reasons; first its about 40x faster. Second, this would create a better print than the first because it would need absolutely no support structure! THE PROCESS
Sara and I have decided to make some kind of screw-based table leg attachment. We both wanted to create something furniture related, but also something useful. Which, with 3D printing, means we will be producing a part of a whole, rather than a whole thing on its own.
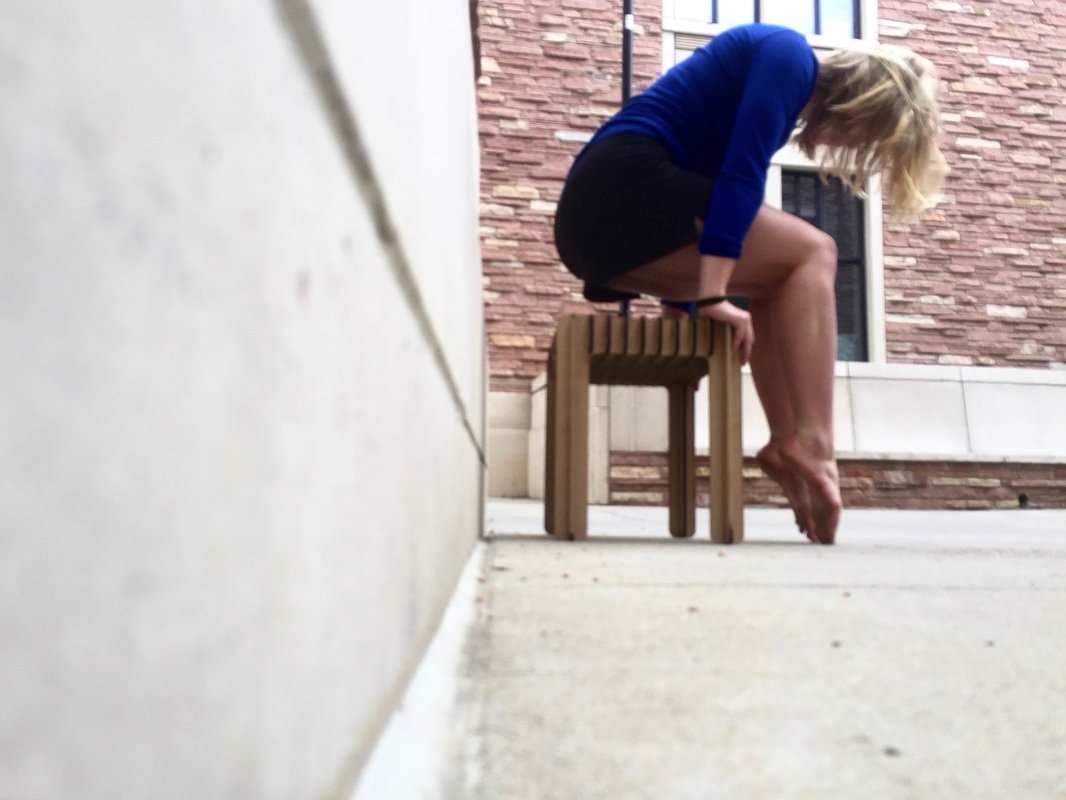
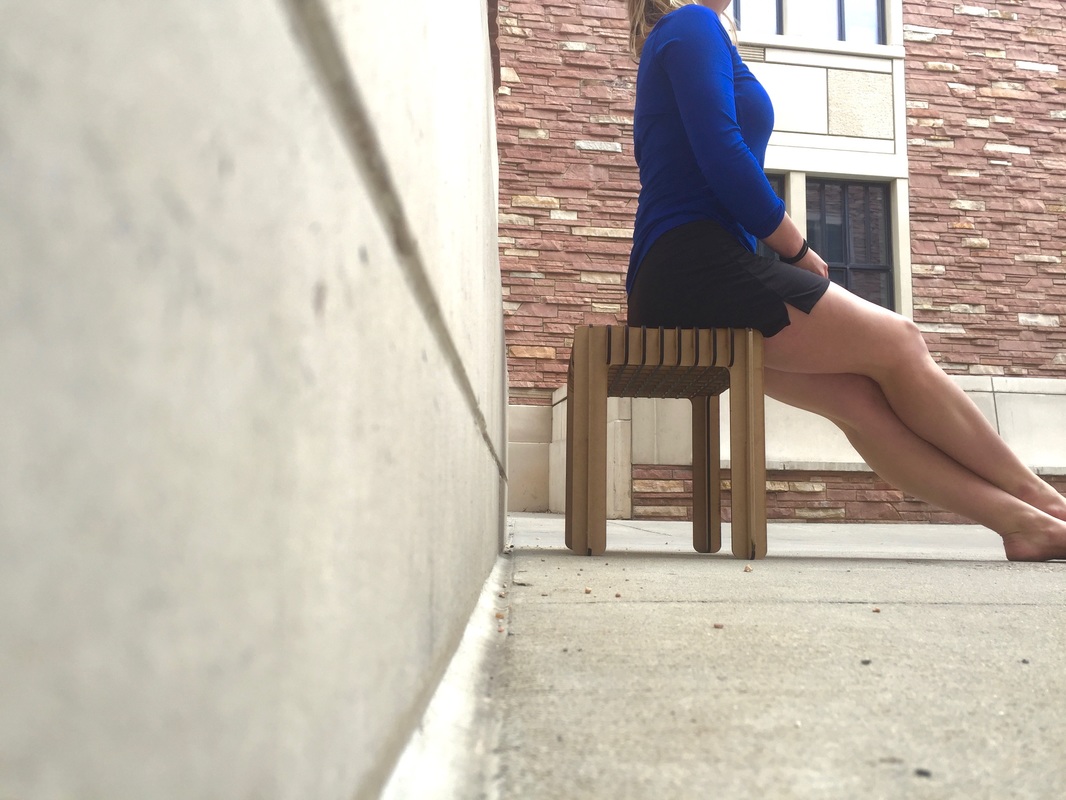
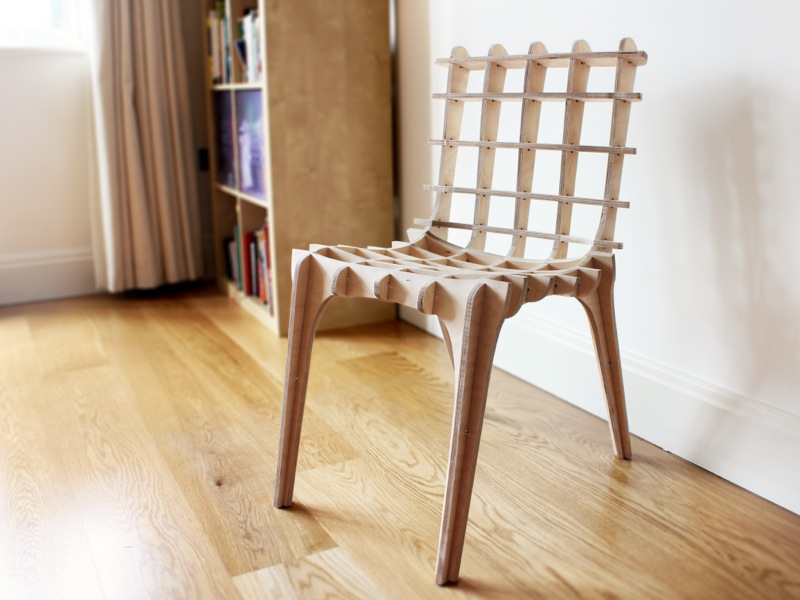
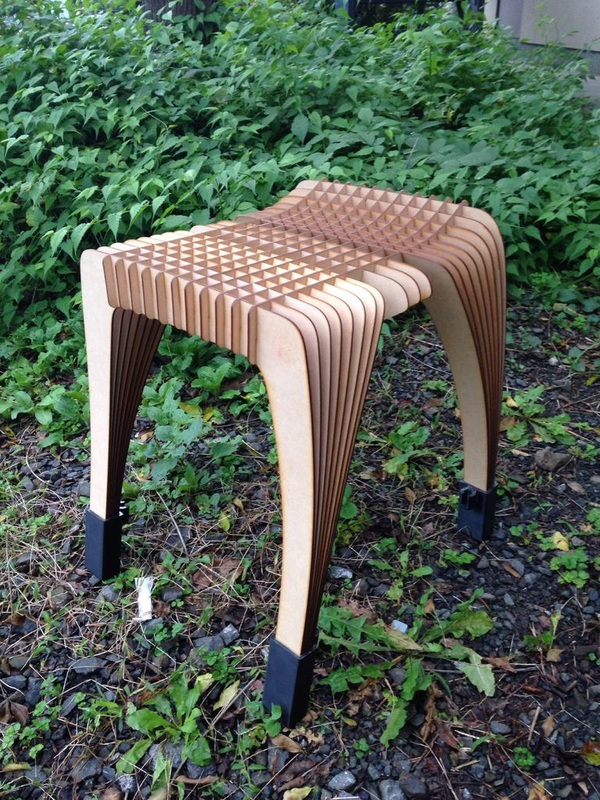
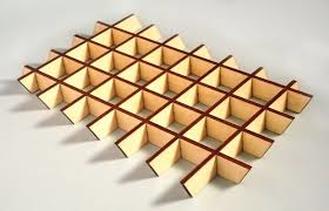
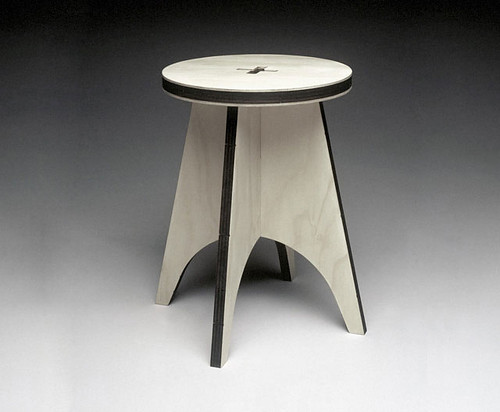
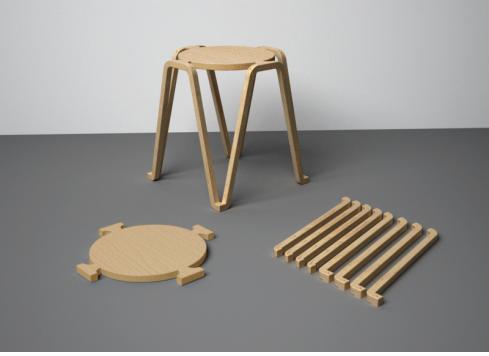
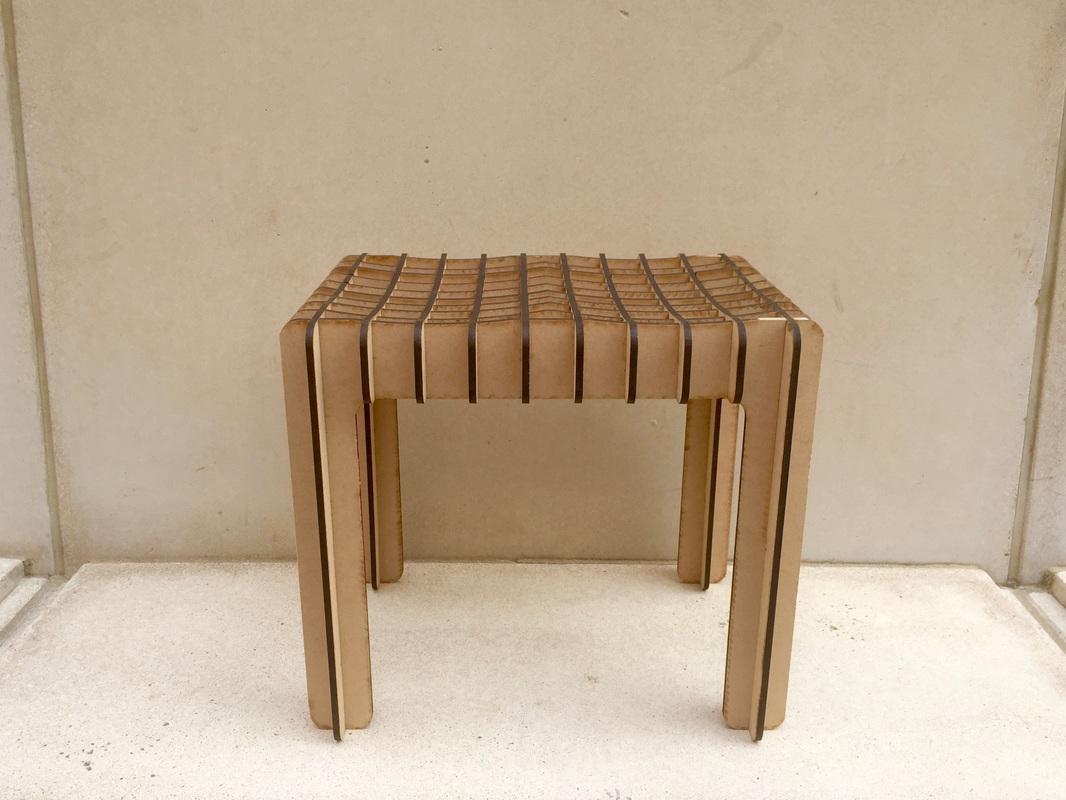 Design StatementIn so many chairs, my feet don’t touch the ground; hanging over the sharp edge of the chair, cutting off the circulation from mid thigh down. This stool was created to contour to my body. On the laser cutter, I have typically created small, flat things, but this assignment gave me the opportunity to explore the vast possibilities of taking a 2D material, and turning it into a 3D project. I do my best to always design with intention, so I designed to create an item that fixed problems I saw with similar items. Being a smaller than average human, ergonomically designed furniture is often built to suit people larger than me. Which often is fine, but with sitting objects (and tables) lead to discomfort. The 6 Stool solves some of the issues I have with other objects for sitting. It has rounded edges, so they don’t sharply press into the thighs of the sitter. It allows for a person of about 5’4’’ to sit with their legs at a 90º angle, also preventing the afore mentioned leg blood flow issue, while also aiding better posture. The grid top allows for a supportive, but light weight and breathable seat, eliminating the sweaty thighs (and the then uncomfortable removal) from plastic chairs.
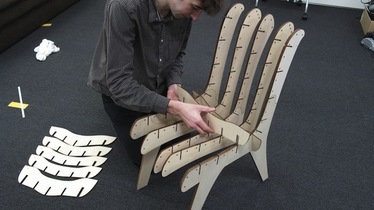
  ProcessFirst, I modeled the area of the laser cutter bed and the amount of material I had. If this were a chemical reaction, these factors would be out limiting reactant. I then modeled the basic outline of the pieces that would form the four leg pieces. I chose a very rectangular designed because that yielded the least wasted material. I also really like 90º angles. The top rectangle was copied and the used for the slats to go between the legs. I then placed the location of the slats using rectangles exactly as wide as the materials is thick, knowing the laser cutter would kerf off some of the material so they fit together snuggly. After that, I extrudeded all the pieces, and put them together as if they were physical, and created a butt that I BooleanDifferenced to create the seat shape. I then deconstructed and silhouetted the solids, and deleted all the curves and solids that were not on the same plane. After that all the pieces were complete, and I went to work arranging them to make the best use of the material space. There are more technical descriptions as captions to the photos in the slide show below. MODELINGCONSTRUCTIONThe production and construction couldn't have been easier! After a few test cuts, everything cut out cleanly and beautifully (except for one corner which went off the edge of the laser cutter a tiny bit, which can be seen in the close up photos below). I then put all of the leg pieces together, then the first layer of slats, and then the top layer. They fit very well; some were tapped in with a hammer, which really makes it sturdy. ADDITIONAL PHOTOSDownload the Model!
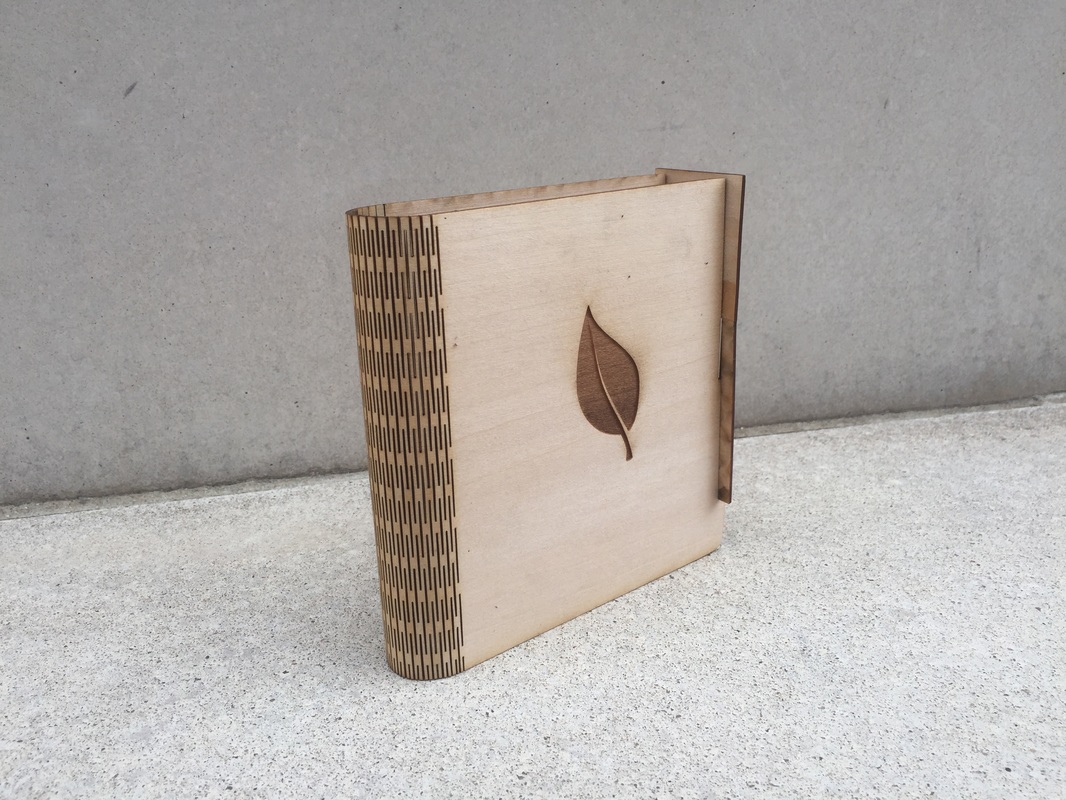 One of the beautiful things that are able to created with a laser cutter is books. The amazing feature is the living hinge (using many small lines to kerf the wood, allowing it to bend). The joinery part is the small piece of wood that holds the book together. The one challenge of this problem is that the wood chosen was very thin and fragile. If we were to repeat this, we would use stronger wood and have a larger living hinge. The ProcessThis process couldn't have been easier. After designing it, all we had to do was laser cut it, and it is done! The joinery bit easily and intuitively slides into place to create a book with the living hinge. 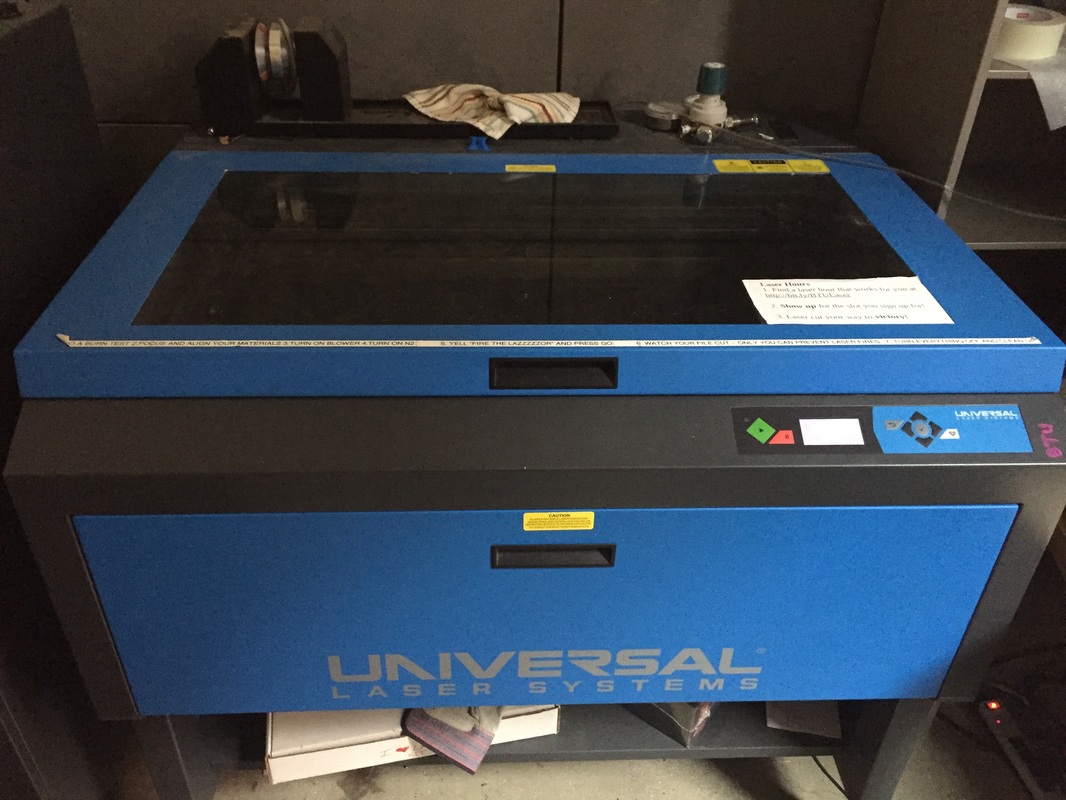 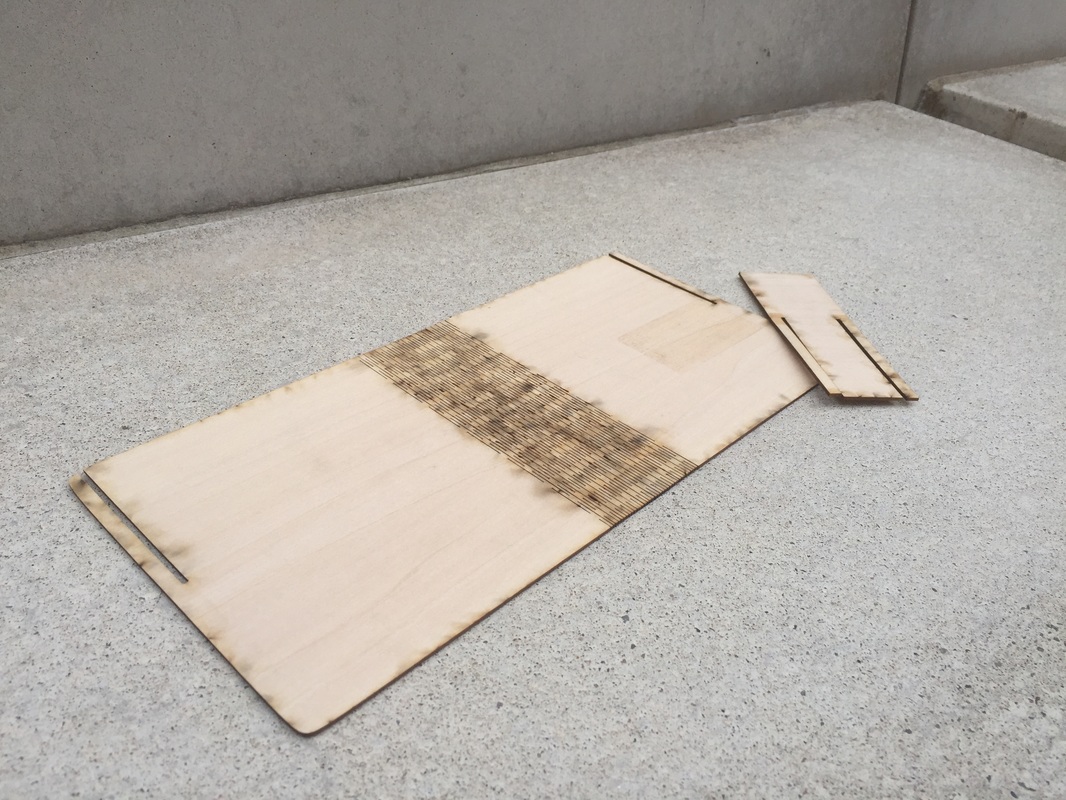 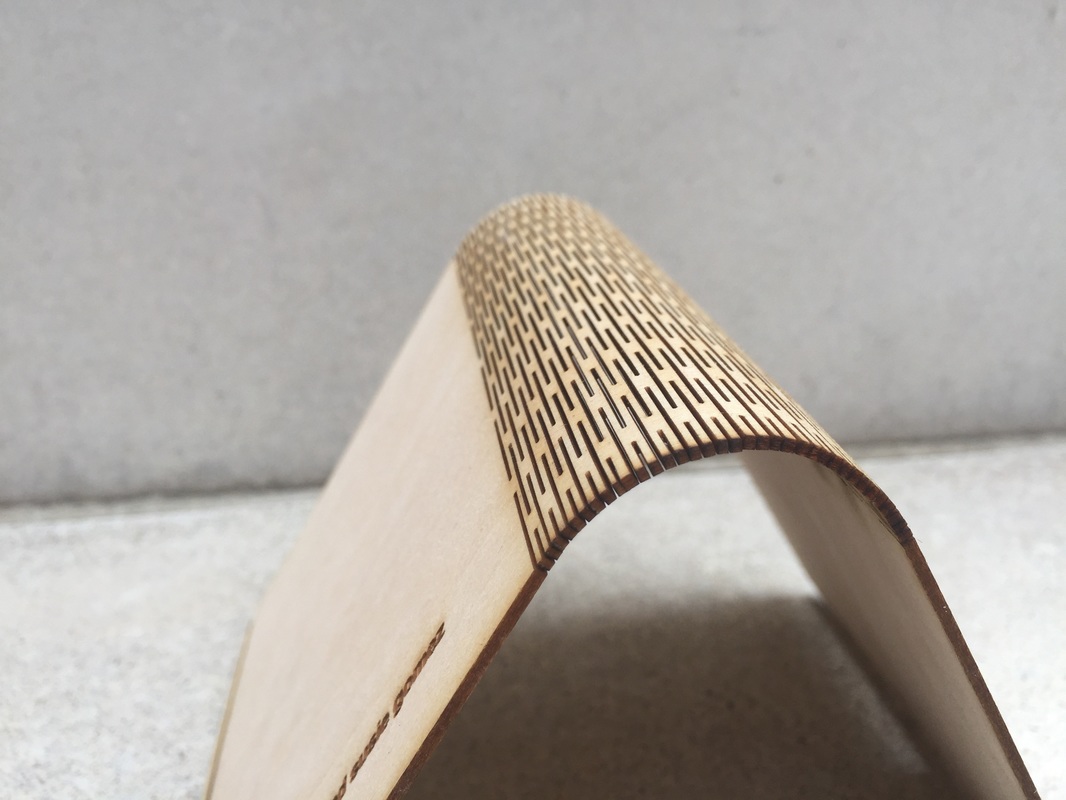
The plugs that hold my bar tape on the drop bars on my road bike fall out every once in a while, and the replacement ones from the bike shop don't match my bike. So I designed a new one! I printed one in blue that I was able to take to class, and printed a set in red for my bike. 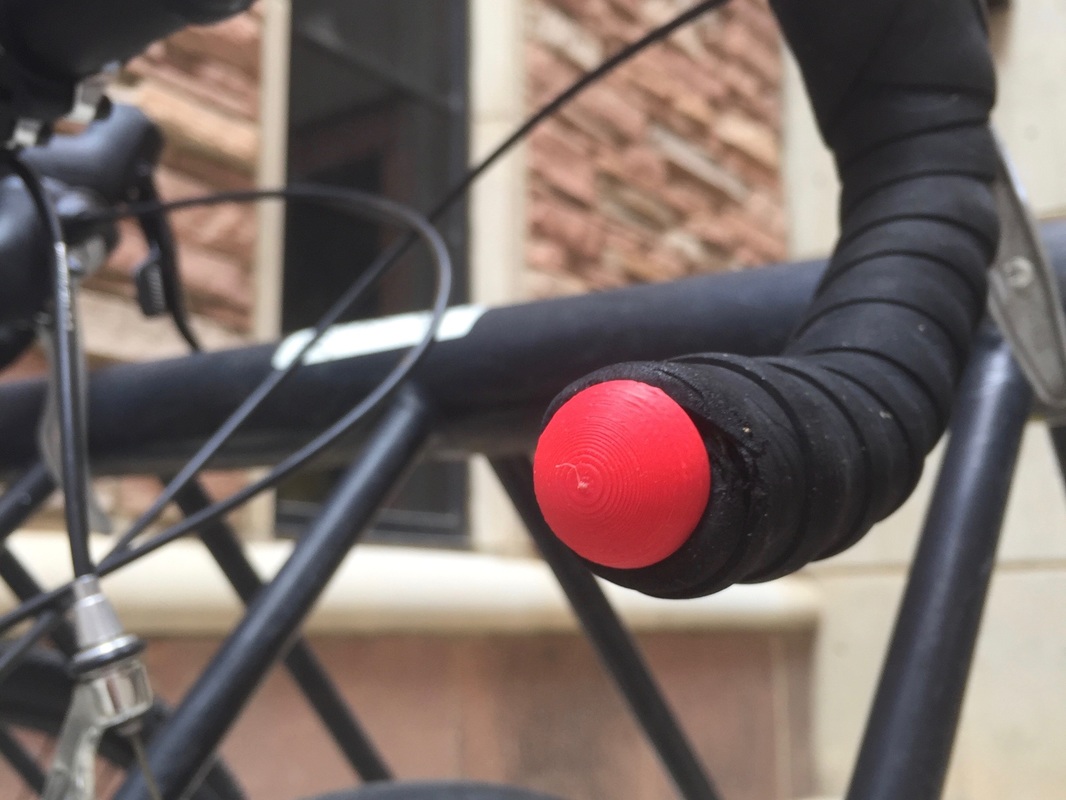 Sketch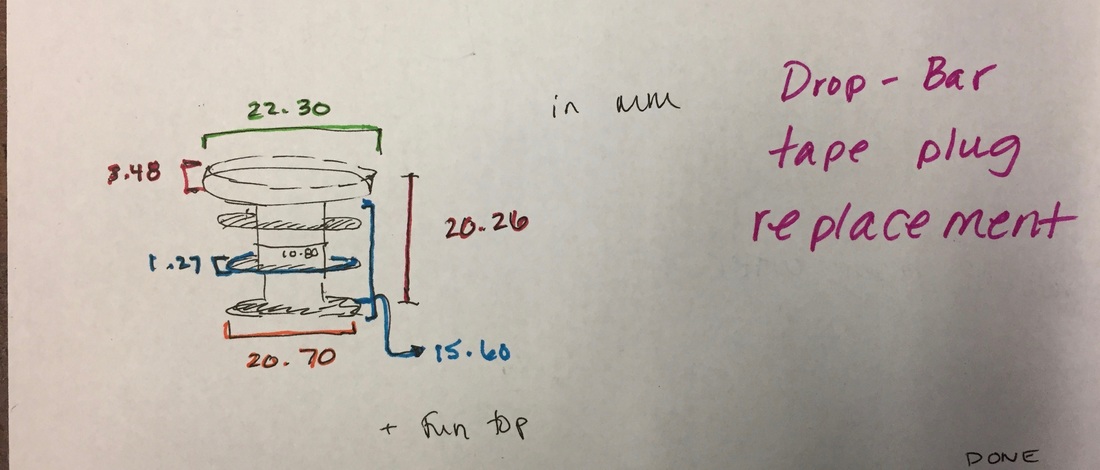 Modeling3D Printing and Post ProductionThe biggest problem was that the 3D printers, (or my file) weren't creating the support structure my model needed. Second, the plastic used to create the original plug was much more flexible than the materials available. So instead of it flexing to fit, so despise modeling the existing plug to .01mm, the first one I printed snapped when I tried to put it in my bike's drop bars tube. So I printed another, and Dremeled down the inner cylinders to fit better.
 This was one of the few times I have laser cut wood, which was interesting. Overall the process was smooth... I was able to find all my materials in the scrap bins, spreading my cut across as many pieces of wood as there are pieces my project. The part I struggled with was that the wood was not cutting all the way through, despite remeasuring the wood, and choosing minimally warped pieces of wood. Overall, this went well and turned out beautifully! Here's the post about the design process. The Laser Cutting Process
Additional PhotosI want to make a useful thing. One of my design goals, is to never make anything that I can't use (or enjoy making and sell). So I would like to make a stool, because stools are useful. There are a few directions I am considering going, all of which I have curated separate photo collections for. ...Along the way I fell in love with some chairs, like this one. But this design is so simplistic, it would copied, rather than drawn from. Below are photos of the two directions I am deciding between. The challenge in my design so far as been ergonomic use of the rather small laser cutting bed. 6 Stool
5 Stool
Initial Proof of Concept(s)
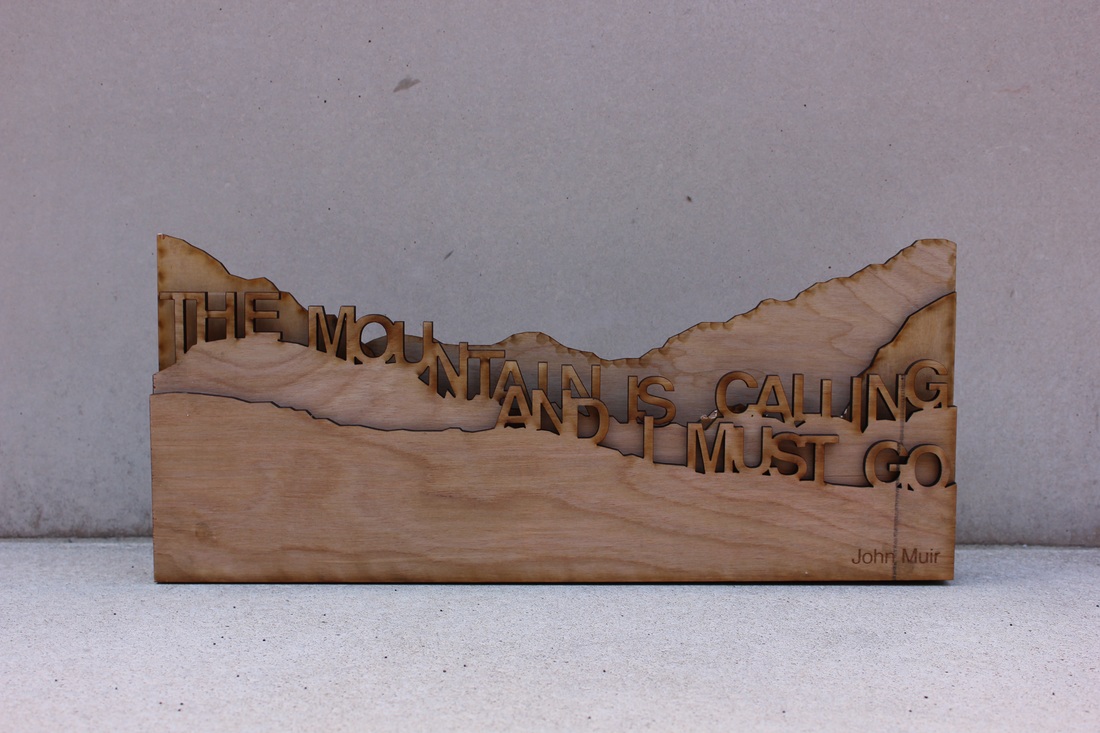
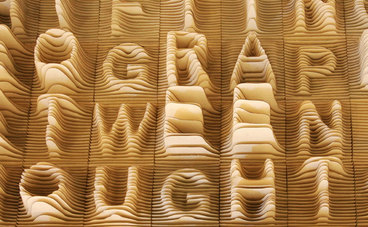
Assignment 4: Typography 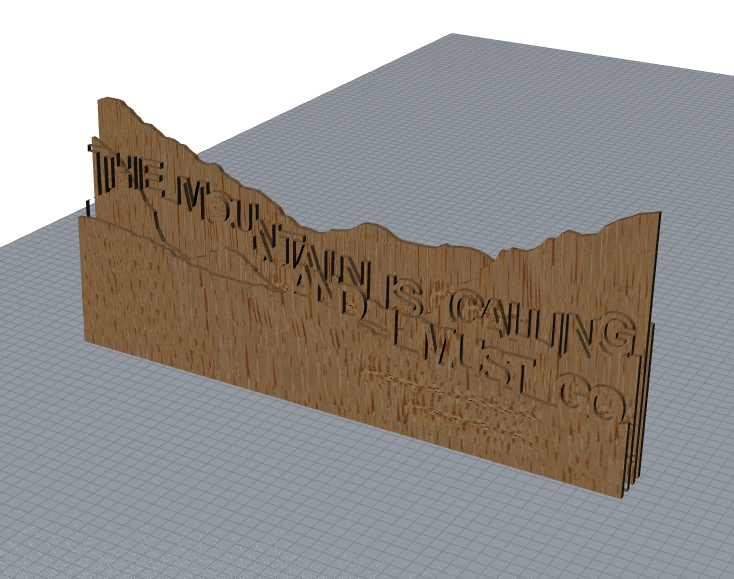 To give an idea of what this would look like cut out, I simply extruded all the curves at ones and put them on top of each other. Since this was made to be laser cut, not 3D printed, they didn't come out perfectly. As you can see with "The Mountain" layer. This won't matter, it was only as an example. The Inspiration
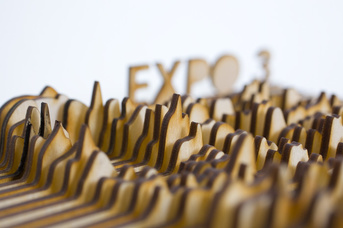
I like mountains. And I like the idea of taking 2D stuff and making it 3D stuff. I liked the way the maker of the topo alphabet turned 2D into 3D, and I liked how the mountains looked in the Expo 3. So I combined these two ideas, and put the words on the ridge of the mountains to be laser cut and then layered to create a field of depth with my favorite mountain quote from John Muir. The Process
Response to The Demise of "Form Follows Function", Dieter Rams: 10 Principals of Good Design, and Startups, this is how design works. If you took someone from the 1600s, and had them try to function a microwave, no matter how well designed, it still would be as difficult as an an iPhone. "Smart phones," although a brick of electronics with endless possibilities, do a good job of setting up the user to be able to function with little to no instruction. Although the physical form could me considered misleading, the majority of the functionality is with the form of the software in the phone more than the hardware. Personally, I've never read the instructions for my iPhone and operate it perfectly, yet have to ask my partner how to change the power level on our microwave every time I need to melt butter. While through the The Demise of Form Follows Function seems to assume us this would not be true and phones would be more challenging than a microwave, given that it displays form is as its function. On my phone, I touch to access apps, which then have more things to touch an move, with no instruction. Having been raised in the system, these things are never a struggle. Dieter Rams also commended Apple in the early 2000s for the design of the first few generations of iPod, saying that Apple was one of the few companies designing who were doing design right, which is very high praise.
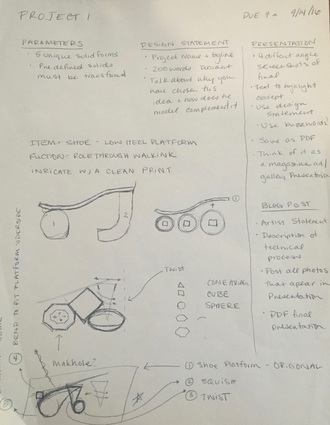
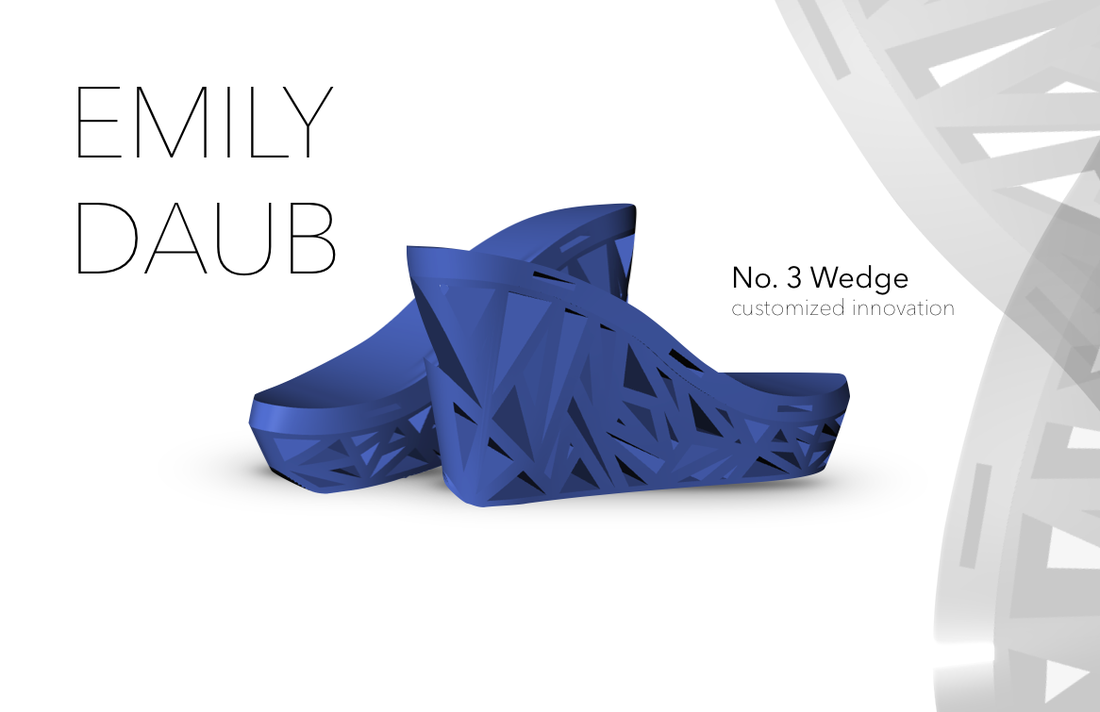 Artist's StatementWe’re able to easily purchase clothes tailored specifically to our bodies. However, with shoes, we still have little ability to customization for comfort. Ill fitting shoes have cased people pain to the detriment of soft tissues as well as simply appearing unattractive. The No. 3 Wedge, aims to correct the struggle between comfort and fashion by utilizing available materials, considering the wearer, and designing with intention. In the development of the model I contemplated the problems with the existing items. In traditional wedge heels, the heel is a relatively simple single shape blocks of cork, wood, or plastic. With 3D modeling and the materials available to 3D print with, we are able to create customized shoes to eliminate discomfort while expanding opportunities for creating beautiful designs. In designing the shoe, I designed for my own foot. The upper sole was created by tracing my foot, and the arc and curvature of my foot is accounted for, both of which are occasionally ignored or incorrect in heels. The shoe also has a role though design on the lower sole to eliminate the bent-knee walk often seen in inexperience high heel wearers. When there is no reliance on tradition methods, we are able to create with the user in mind.
Sketches
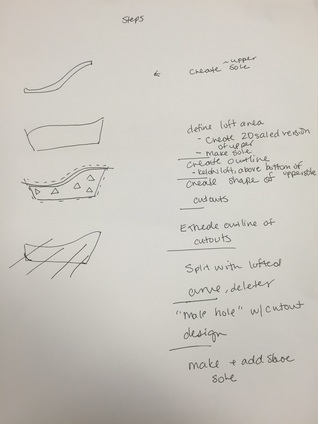
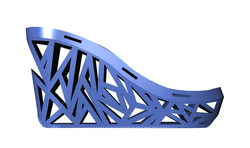
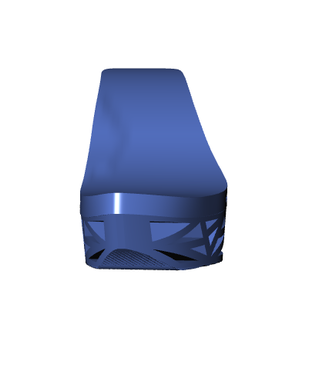
Technical ProcessAdditional Photos
Presentation Sheet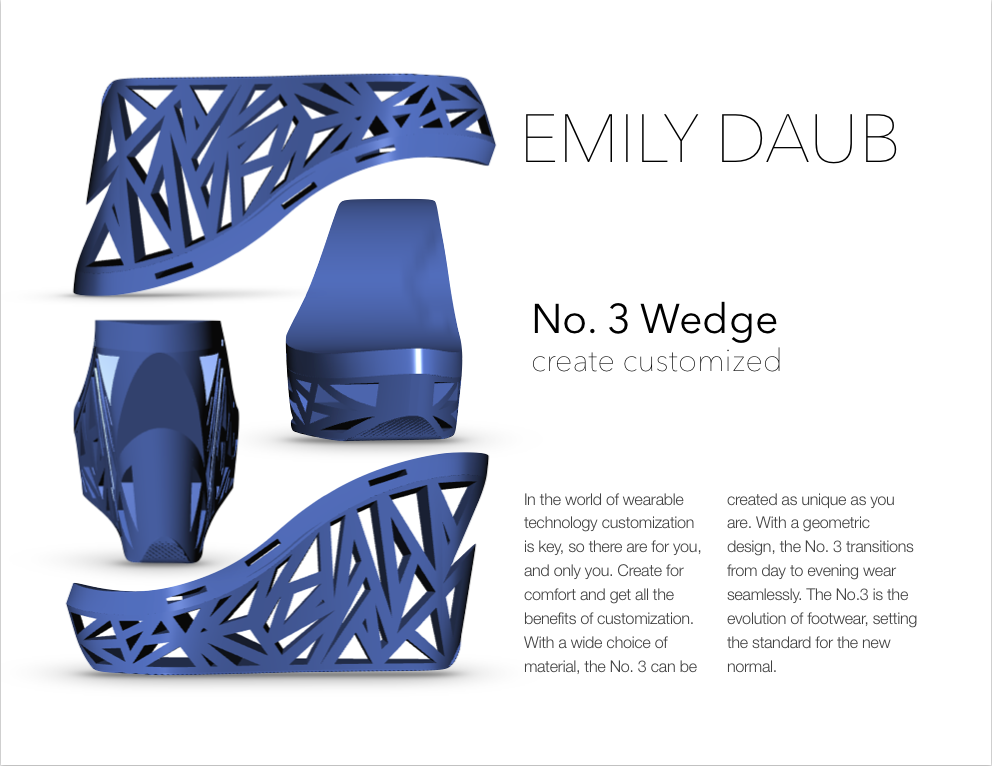
Get the file!
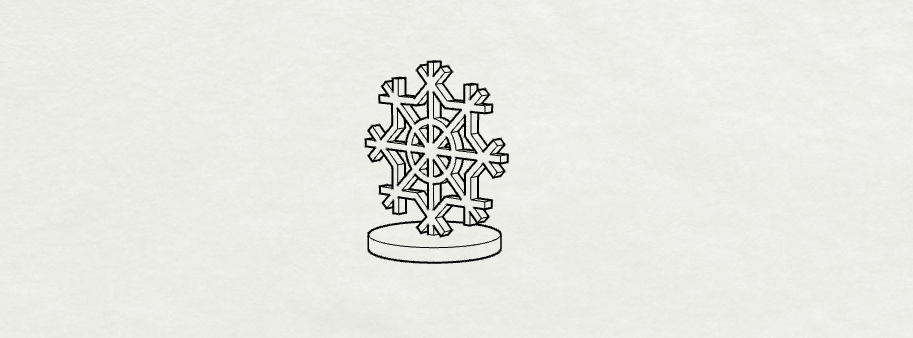
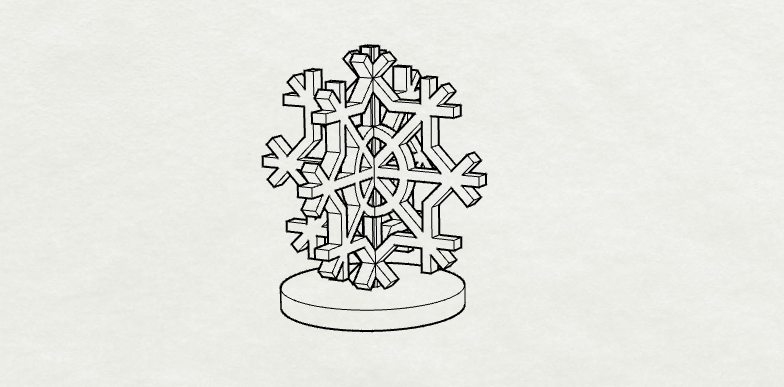 I got carried away...Bored by the snowflake, I decided to make something slightly more challenging; a flower! It still fits in the given dimensions for the project, and should stand very well on its on. 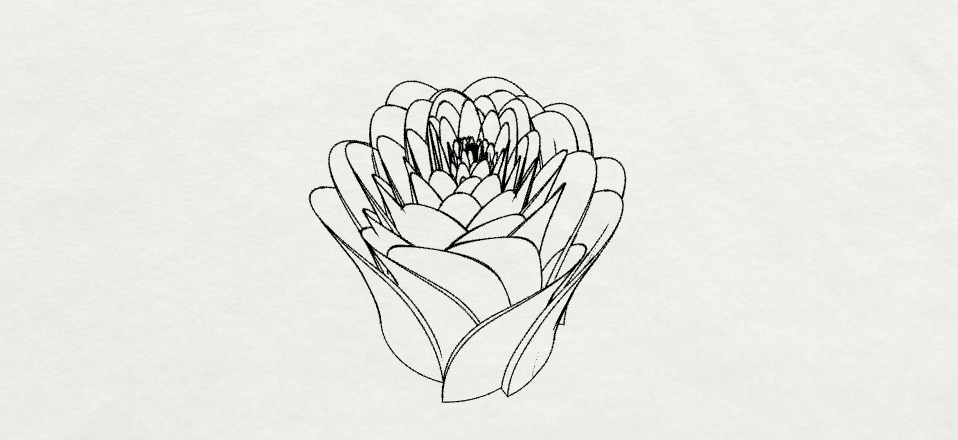
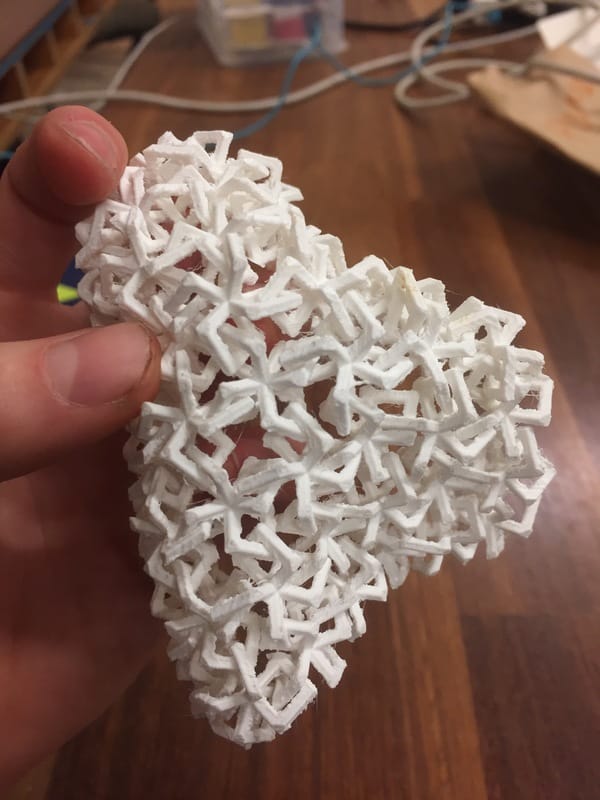
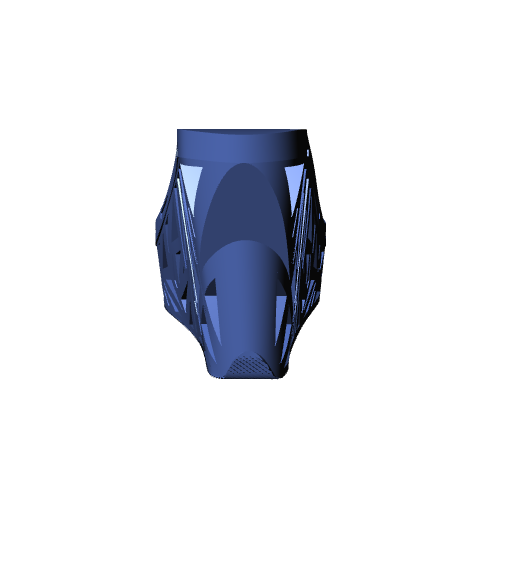
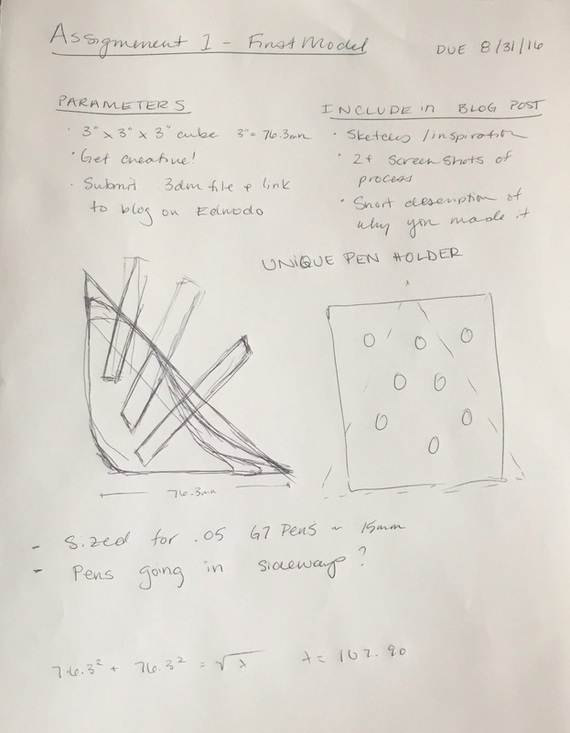
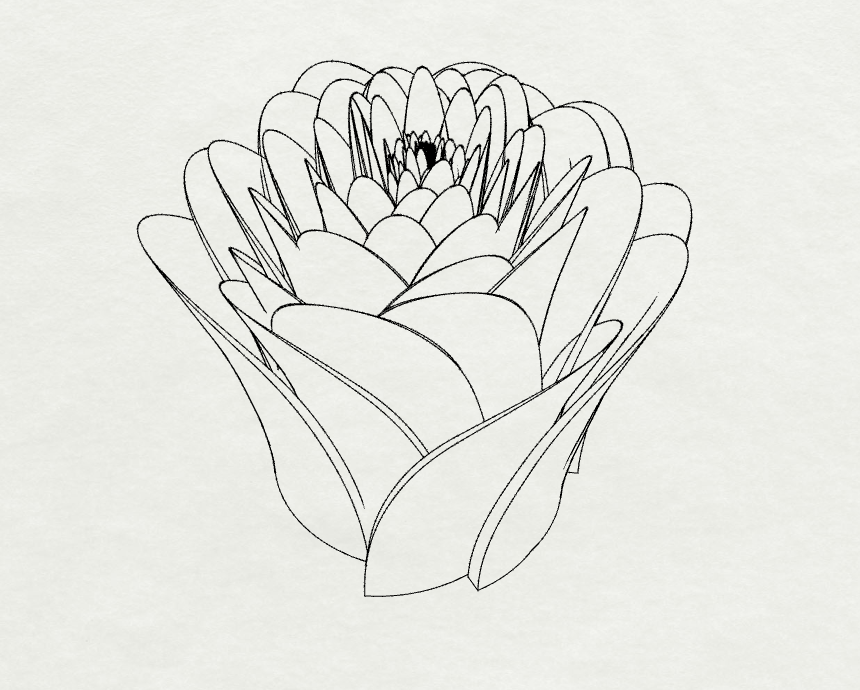 SketchesI am realized sketching isn't my strength for communication of ideas, because none of my initial ideas make it. The snowflake I liked, because it seemed to fit with other game piece type items; has relatively little complicated detail (perfect for the injection molding required to produce millions of little monopoly pieces). The crown on the pillow was going to be too stout for the dimension requirements... But once I was modeling, I got inspired. So these are my sketches: 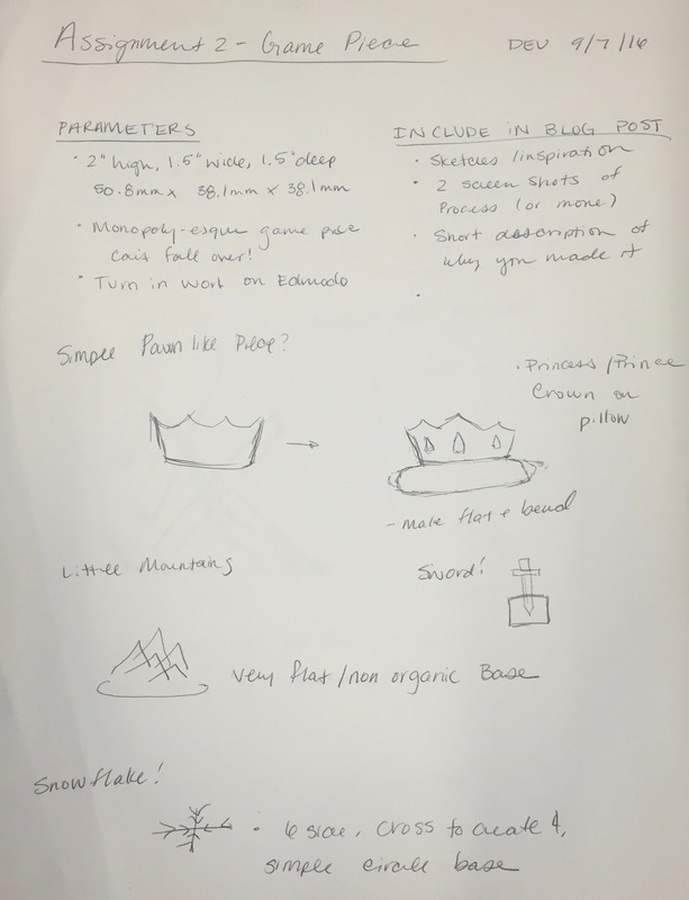 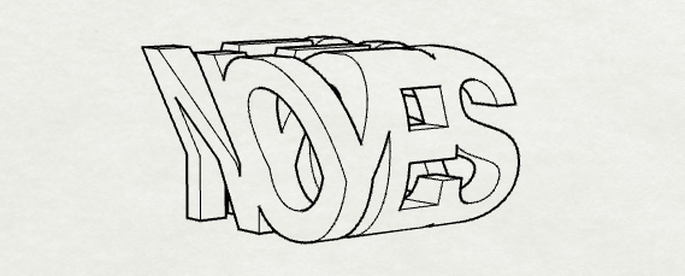 I have always really enjoyed art that changed depending on the perspective of the viewer; as I have found this is both visually interesting and great commentary on most of our interactions: it depends on how you see it. I started off with the idea of making a pen holder for my desk, where I currently have a stack of about 3 black G7 .5s, but didn't like how it was turning out, so I changed courses completely. As the instructions for this assignment were to "get creative!" I was also thinking this was a little more creative then a pen holder with clean lines. THE PROCESS
|
archive
January 2018
topics
All
|
||||||||||||||||||||||||||||||||||||||||||||||||||||||||||||||||||||||||||


 RSS Feed
